
The instructions below describe how to set up an Appium instance on a Windows machine and to configure it to manage Android devices.
1. Install JDK
-
Download the installation package from this website:
 https://www.oracle.com/java/technologies/javase-downloads.html
Run the installer and follow the instructions you will see on the screen.
-
Specify the path to your JDK version in the
JAVA_HOMEenvironment variable. To do this, open the Control Panel, search for “environment variables”, in the subsequent dialog, click Environment Variables, and then set the variable value: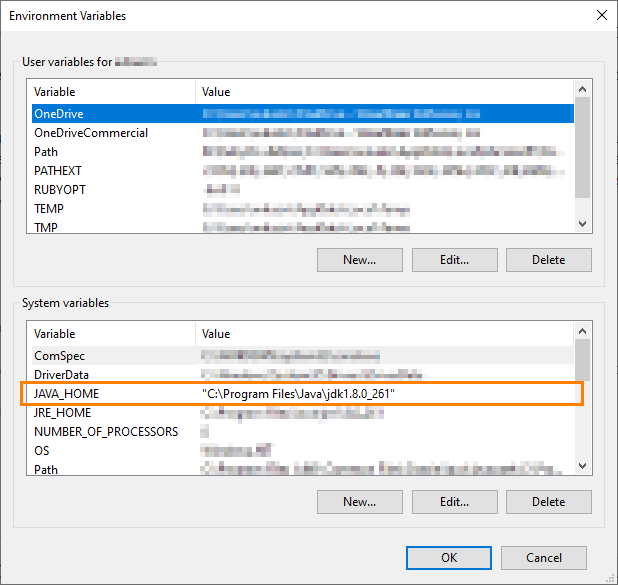
2. Install NodeJS and NPM
Download the installation packages from this website:
https://nodejs.org/en/download/
Run the installer and follow the instructions you will see on the screen.
3. Install Appium
-
Start the Command Prompt as an administrator.
-
Run the following command:
npm install -g appium
-
After the installation is over, run Appium to ensure it works. To do this, run this command in the Command Prompt (it should be run in the administrator mode):
appium
4. Install AndroidStudio
Download the installation package from the following website:
https://developer.android.com/studio/
Run the installer and follow the instructions you will see on the screen.
 When installing, make sure to select the Android Virtual Device component:

5. Configure Android virtual devices
-
Start AndroidStudio.
-
In the Welcome dialog, select Configure > SDK Manager.
In the subsequent SDK Manager dialog box:
-
On the SDK Platforms tab, select the SDKs that you will need for testing.
Select at least one SDK. -
Switch to the SDK Tools tab and make sure the following tools are selected there:
- Android SDK Build-tools
Note: Select the latest available version. - Android SDK Platform-Tools
- Intel x86 Emulator Accelerator (HAXM installer)
- Android SDK Build-tools
-
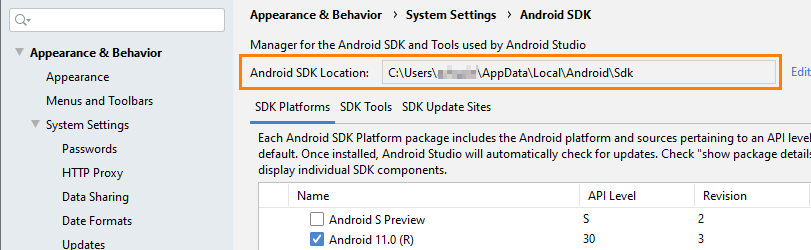
Copy the value of the Android SDK Location box at the top of the SDK Manager dialog. We will need this value later:
Close the SDK Manager.
-
-
Now, in the Welcome dialog, select Configure > AVD Manager. This will open the AVD Manager dialog where you can create and launch Android virtual devices (emulators).
If the dialog doesn’t list the device you need, click Create Virtual Device and create the needed device emulator.
-
To create and run tests, you need to specify the path to Android SDK files (the one that the “Android SDK Location” text box displayed) in the
ANDROID_HOMEenvironment variable: open the Control Panel, search for “environment variables”, in the subsequent dialog, click Environment Variables, and then set the variable value. If the variable doesn’t exist, add it to the “System variables” list: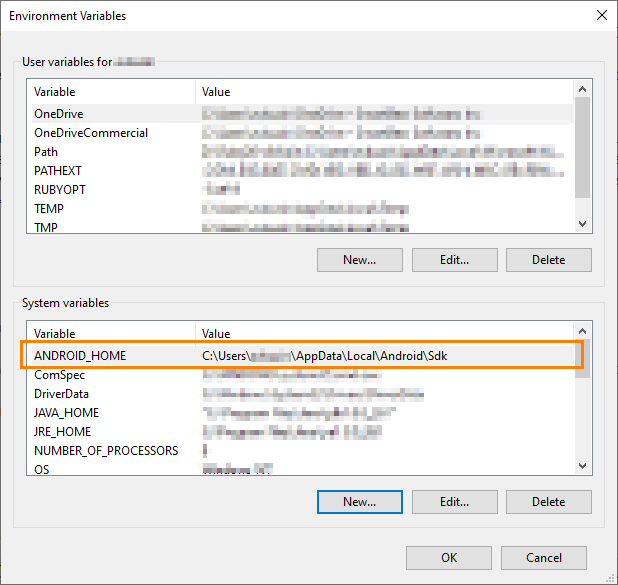
After Appium is set up and configured and has mobile devices managed, you can connect to it from your TestComplete computer to create and run tests. See Connecting to Mobile Devices and Opening Testing Sessions.