
XAML browser applications (XBAPs) are applications that reside on an Internet or Intranet site and that are loaded and executed in an Internet browser on the client computer. For this application to be successfully loaded and run, they must have specific security settings:
 If You Use .NET Framework 4 and Later
If You Use .NET Framework 4 and Later
Compile your XAML browser application as a full trust application:
-
In Visual Studio, open your application project properties, and, on the Security tab page, click This is a full trust application:

Click the image to enlarge it.
-
Recompile the application.
If You Use an Earlier Version of .NET Framework
Modify the application manifest to specify required permissions and configure the .NET Framework security policies:
| Note: | For successful testing, the Framework’s security settings must match or provide wider access than the settings specified in the application manifest.
If you test your XAML browser application on a computer where .NET Framework 4.7 is installed, compile your application as a full trust application (see above). Otherwise, TestComplete will not be able to access the application's internals. |
1. Modify the Application Settings
If you use Visual Studio 2008, you can modify the application manifest in the project property editor:
-
Open your application in Visual Studio.
-
Right-click the project node in the Solution Explorer and select Properties from the context menu. This will open the Project Properties page.
-
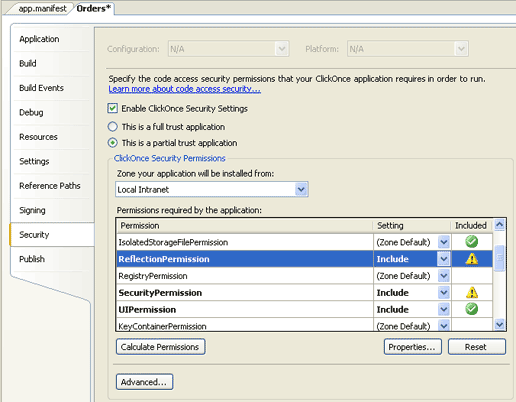
Switch to the Security tabbed page. On this page you can specify the security settings.
-
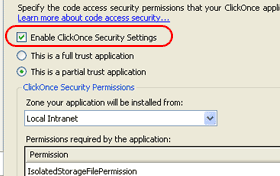
Select the Enable ClickOnce Security Settings check box.
-
To give all permissions to the application, select This is a full trust application. Then save the changes and recompile the application. You are done.
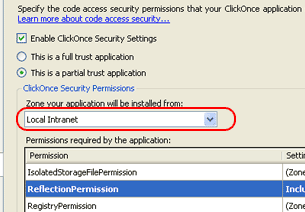
If you cannot give all permissions to the application, select This is a partial trust application and then specify the permissions using the controls on the page. This is explained below.
-
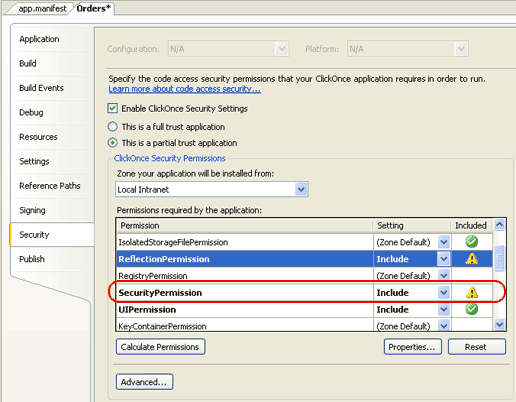
Specify the zone (Internet or Local Intranet) where your application will be loaded.
-
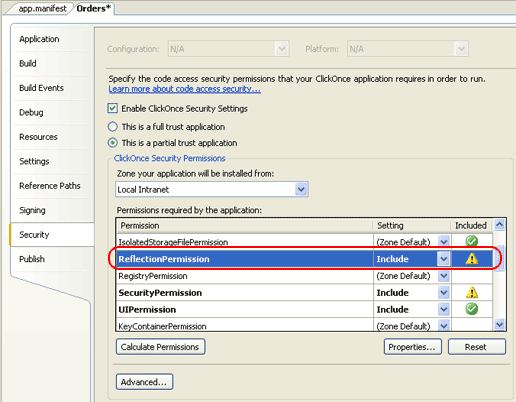
In the Permissions list, select the ReflectionPermission row and specify Include in the Settings column.
Then press Properties. This will display the Permission Settings dialog.
-
In the dialog, select the following check boxes:
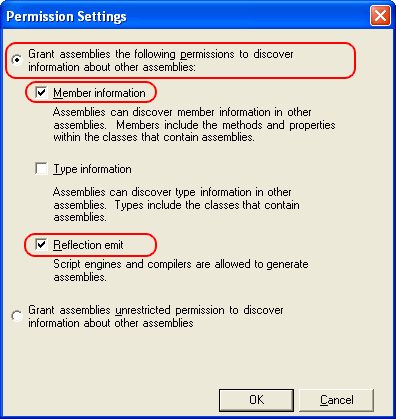
The image shows the minimum required settings. You can also select the Type information check box or choose the lower radio button (“Grant assemblies unrestricted permission...”).
Click OK to save the changes and to close the dialog. You will return to the Security page of the project properties editor.
-
In the Permissions list, select the SecurityPermission row and choose Include in the Settings column.
Then press Properties. This will display the Permission Settings dialog.
-
In the dialog, select the following check boxes:
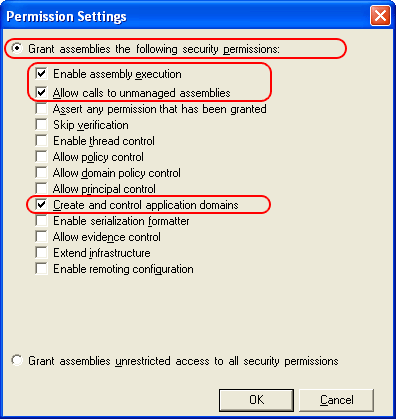
The image shows the minimum required settings. You can also select other check boxes or choose the lower radio button (“Grant assemblies unrestricted access to...”).
Click OK to save the changes and to close the dialog.
-
Save the changes and recompile the application.
2. Modify Security Policy on Your Computer
-
Open the Control Panel | Administrative Tools window.
-
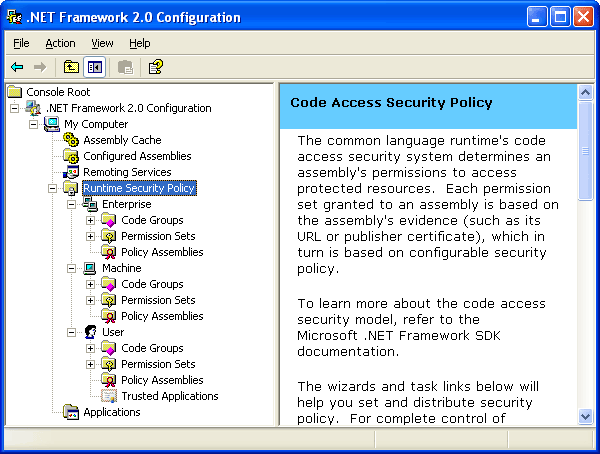
Double-click the Microsoft .NET Framework 2.0 Configuration shortcut.
This will invoke the .NET Framework 2.0 Configuration console.
-
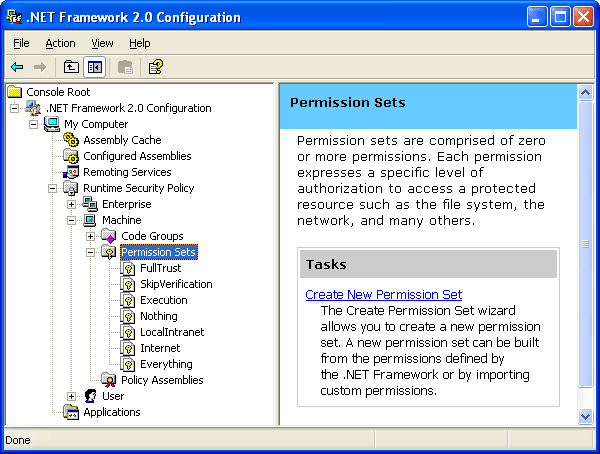
Expand the tree down to the Runtime Security Policy node.
-
The security policy can be specified at three levels: Enterprise, Machine or User. Visually, all levels are similar and have the same child nodes structure.
Select the desired level and expand the tree down to the Permission Sets node:
-
Select Local Intranet or Internet permission set (choose the set the corresponds to the zone where your application will be loaded).
Right-click the selected node and then choose Duplicate from the context menu.
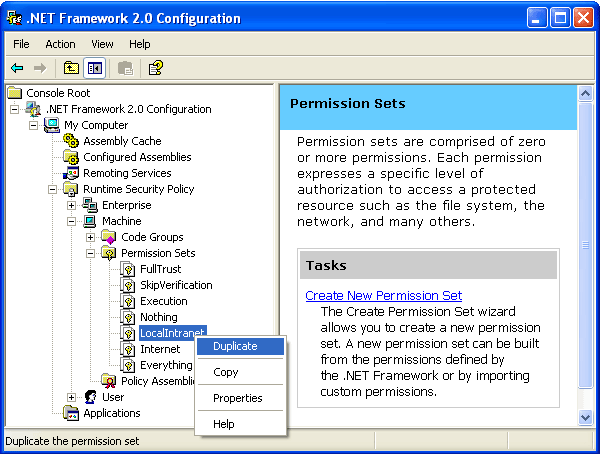
This will create a copy of the selected permission set.
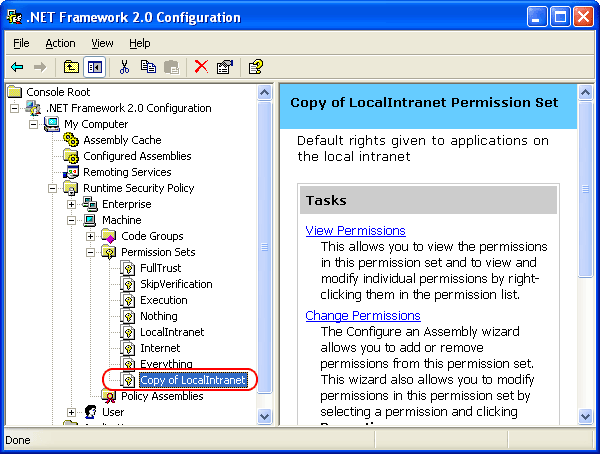
You can rename the permission set name by right-clicking the desired node, selecting Rename from the context menu and typing the desired name in the ensuing in-place editor.
-
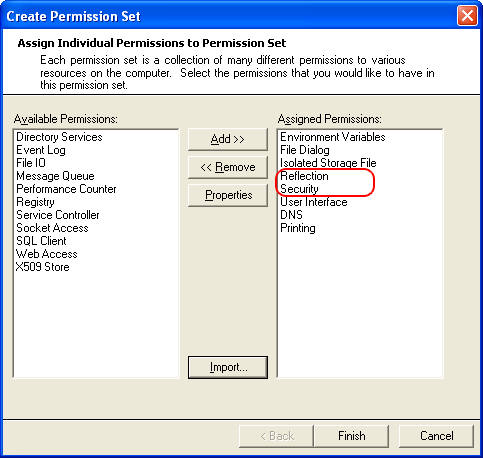
Right-click the copy node and select Change Permissions from the context menu. This will call the Create Permission Set dialog.
-
In the dialog, add the Reflection and Security permissions to the Assigned permissions list:
-
Right-click the Reflection permission and press Properties. This will display the Permission Properties dialog (the same that we saw when specifying application properties):
In the dialog, set the same properties which you specified when editing the application settings.
Press OK to save changes.
-
Right-click the Security permission and press Properties. This will display the properties dialog for this permission (this is the same dialog that we saw when specifying application properties):
In the dialog, set the same properties which you specified when editing the application settings.
Press OK to save changes.
-
Click Finish to close the Create Permission Set dialog.
-
In the configuration console, expand the Code Groups | All_code node and select either Internet_Zone or LocalInternet_Zone nodes according to the zone where your application will be loaded. You can also select the All_code node to set the permissions for all zones.
-
Right-click the selected node and choose Properties from the context menu:
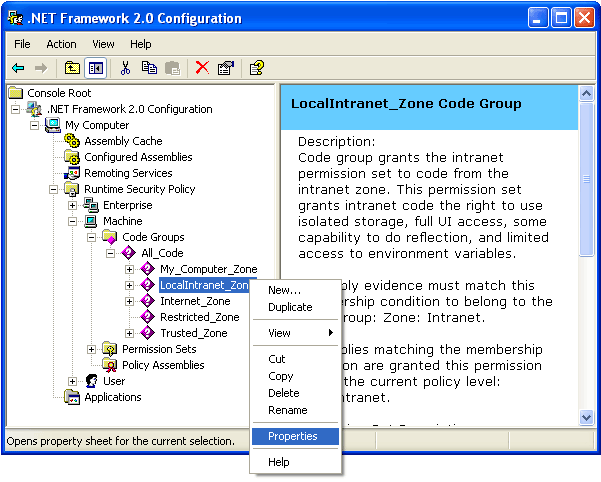
-
In the ensuing Code Group Properties dialog, switch to the Permission Set tabbed page and specify the permission set you created:
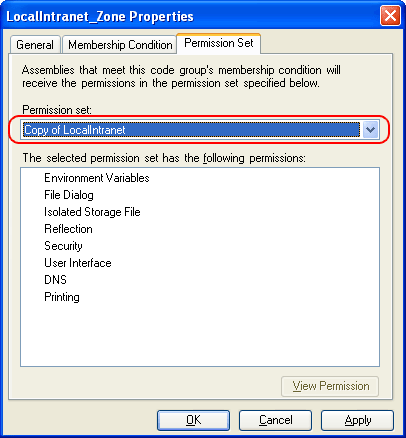
You can also select the FullTrust permission set. This will give full permissions to all XAML browser applications. Note, however, that these permissions correspond to the security level with the least security.
-
Press OK to close the dialog and to save changes.
See Also
Testing WPF Applications
Specifics of Testing XAML Browser Applications (XBAPs)