
The Picture panel of the generic test log page displays the image or images associated with the message that is currently selected in the Test Log panel of the log.

Click the image to enlarge it.
The panel is visible by default. If the panel is hidden, to display it, you can do one of the following:
-
Click Select Panel on the Test Log toolbar and then click Picture.
– or –
-
Select View > Desktop > Restore Default Docking from the TestComplete main menu.
Each message posted to the test log may have an image or images associated with it:
-
You can attach an image to a message when calling scripting methods or keyword test operations that post messages to the log. When you select this message in the Test Log panel, the Picture panel displays the attached image.
-
If Test Visualizer is enabled, during the test execution, TestComplete captures and logs images for test commands that simulate user actions. If a test command has another image that was captured for it during the test recording, TestComplete posts both “recorded” and “playback” images, and the Picture panel displays these two images. This lets you compare the tested application's states and easily see if the application’s actual state differs from that the test engine expects.
 |
When you run your tests from Connected Applications, the ensuing test log does not provide you with screenshots captured during the test execution. It means that the Pictures panel is empty for such tests. This situation is caused by the fact that the Visualizer feature is disabled when you run your tests from Connected Applications. |
Picture Panel Displaying One Image
When the Picture panel displays one image, it contains the following toolbar items:
 Open Picture In Image Viewer - Displays the image in the Image Viewer.
 Scroll Mode - Activates the Scroll mode. When the panel works in this mode, you can move the image within the panel by dragging it with the mouse.
 Selection Mode - Activates the Selection mode. When the panel works in this mode, you can drag the mouse over the image to select a rectangular area of the image. After that, you can copy the selected area to the clipboard by selecting Copy from the context menu.
You can also copy the entire image to the clipboard by right-clicking the image and choosing Select All or Copy from the context menu.
Zoom slider - Changes the scale of the image. Alternatively, to change the image scale, you can use the + or - keys or rotate the mouse wheel while holding the Ctrl key pressed.
 Zoom Default - Sets the scale to 100%.
 Best Fit - Changes the width and height of the image so that it fits in the panel’s bounds.
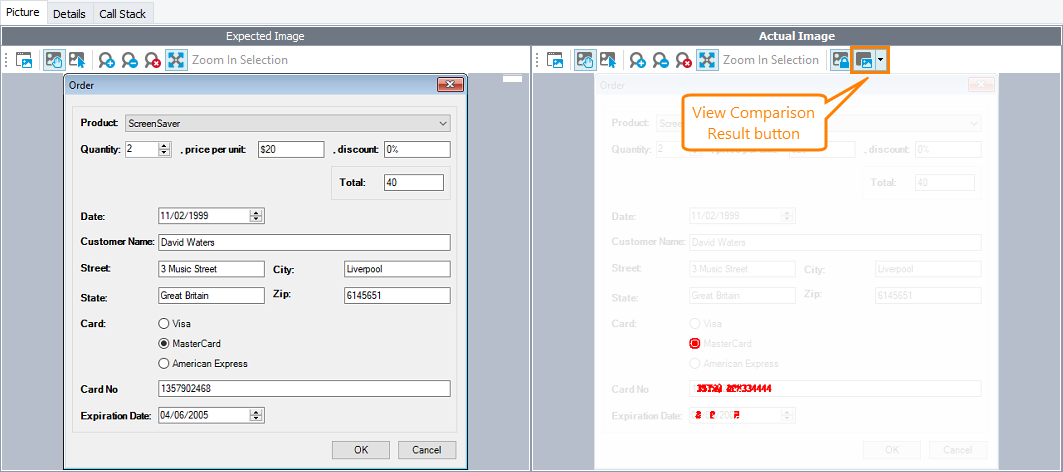
Picture Panel Displaying Two Images
If a log message has two images captured for it by the Test Visualizer engine, the Picture panel displays the Expected Image and Actual Image sections. The Expected Image section shows the image that was captured during the test recording. The Actual Image section displays the image that was captured during the test run. If the Auto-update frames during the run project option is enabled and Test Visualizer does not find an image for a test command, it will capture it during the first test run and display it in the Expected Image section. In this case, the Expected Image and Actual Image sections of the Picture panel will display the same images.
You can compare the expected and actual images and see whether the application's state differs from what you expected (see below).
The object a test command works with is highlighted with a red rectangle on both images.
Both sections contain toolbar items that are similar to the items described above. However, the Actual section includes two additional items that simplify comparison of the “recorded” and “playback” images:
 Synchronize View - Activates the Synchronize View mode. If this mode is enabled, when you are scrolling one of the images, the Picture panel automatically scrolls the other panel to the same distance and direction. If this mode is inactive, the images are scrolled independently from each other.
 View Comparison Result - Selects and activates the comparison mode. If any mode is active, the Actual Image section displays the difference between the “recorded” and “playback” images.
TestComplete has three comparison modes:
- White background - when selected, TestComplete fills identical pixels with white color.
 Light background - when selected, TestComplete lightens identical pixels.
 Dark background - when selected, TestComplete darkens identical pixels.
| White Background | Light Background | Dark Background |
|---|---|---|
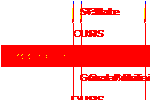 |
 |
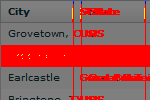 |
All other rules of highlighting pixels are the same for all of the comparison modes:
- The pixels that differ from one image to another are highlighted with red.
- The excess areas (when the images have different height or width) are highlighted with fuchsia.
- Dissimilar pixels that were skipped due to the PixelTolerance parameter are highlighted with blue.
- Dissimilar pixels that were skipped due to the ColorTolerance parameter are highlighted with yellow.
- The pixels that were skipped due to the Transparent parameters are --
- Transparent for BMP and PNG images.
- Filled with gray for images of other formats.
Note: The pixels skipped due to the Transparent and Mask parameters of the Picture.Differencemethod are filled with gray for all supported image formats.
These modes help you easily see differences between the expected and actual images:
For more information on comparing the images, see Comparing Recorded and Playback Images.
To perform the comparison, the panel uses the same comparison engine as that used by region checkpoints and scripting methods that compare and find images. For more information on this and on factors that affect the comparison, see How the Image Comparison Works and Factors Affecting Image Comparison.
The context menu of the Actual Image section also contains an additional item: Update Visualizer Data. This menu item allows you to update Visualizer frames directly from the test log. For more information, see Manual Update From the Test Log.
See Also
Generic Test Log - Test Log Panel
Viewing Additional Information for Messages
Comparing Recorded and Playback Images
How Image Comparison Works
Factors Affecting Image Comparison
Arranging Columns, Lines and Panels
Posting Images to the Log