
You specify request data in the request editor. The editor offers several tab pages that display parameters, headers, and body in different formats. Let’s see how it works.
Test the request
Let’s test our request first:
-
Open the Request 1 step editor, and switch to the Form tab:

Click the image to enlarge it.
-
Type some city name into the address box, for example, Stockholm:

Click the image to enlarge it.
-
Click
 on the editor toolbar to send the request.
If the endpoint is specified correctly, you will see the response contents:

Click the image to enlarge it.
Insert property values
To refer to a property, you use a property expansion expression like this:
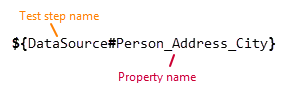
The test engine will “expand” this expression and insert the property value before sending the request. For complete information on this functionality and supported syntax, see Property Expansion.
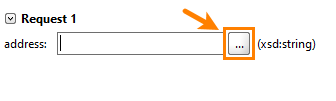
You can either type the expression manually, or select a property visually by using the Get Data command. The latter is available if you have a ReadyAPI Test license, trial or commercial. Let’s see how this command works:
-
Click the ellipsis button in the address edit box:
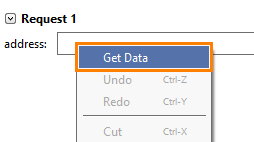
Note: Some editors and dialog boxes have the Get Data command in the context menu, some others offer both the ellipsis button and the menu command:
-
In the subsequent Get Data dialog:
-
Select your test case, the Data Source test step and the Person_Address_City property.
-
Click Add.

Click the image to enlarge it.
-
That’s all. ReadyAPI will insert the property expansion expression into the address edit box:

Click the image to enlarge it.
Now, if you run the request, this expression will be replaced with data from your data source.
You are now ready to add the data source loop to your test case.