In this tutorial, we will record a simple interaction with a website and generate a test case based on this interaction.
1. Open the Discover API dialog
-
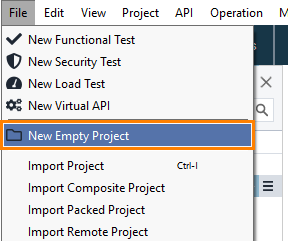
Select File > New Empty Project and select:
-
Select Discover API in the flyout menu:

Click the image to enlarge it.
-
Select Use the built-in browser and click Add API:

Click the image to enlarge it.
-
Click Add API to start recording.
2. Specify definition
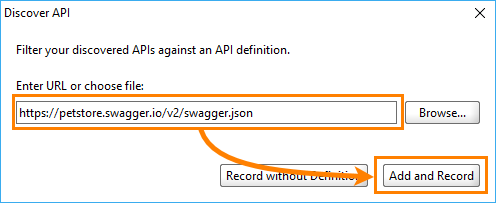
ReadyAPI will offer you to specify an API definition. It allows you to filter the recorded requests and show only those that were sent to the specified web services.
You can specify the URL of the definition file or the path to the file. In this tutorial, we will use the sample Swagger Petstore service:
Specify this URL in the Discover API dialog and click Add and Record:
3. Record requests
ReadyAPI shows the Recording Overview dialog after test recording has started.
-
Enter https://petstore.swagger.io/ and press Enter:

Click the image to enlarge it.
-
In the pet Everything about your Pets section, click the GET method that corresponds to the
/pet/findByStatusresource and click Try it out.
Click the image to enlarge it.
-
The editor will offer you to select one of the available values for the status parameter. Select available and click Execute:

Click the image to enlarge it.
-
Scroll down to the Responses section and find the response body. It contains a list of pets that is represented by the Pet object, for example:
XML
<Pet>
<category>
<id>0</id>
<name>string</name>
</category>
<id>545646666</id>
<name>doggie</name>
<photoUrls>
<photoUrl>string</photoUrl>
</photoUrls>
<status>available</status>
<tags>
<tag>
<id>0</id>
<name>string</name>
</tag>
</tags>
</Pet>Copy the value of the id element.

Click the image to enlarge it.
-
Go down to the store Access to Petstore orders section, click the POST method that corresponds to the
/store/orderresource, and click Try it out.
Click the image to enlarge it.
-
The editor will show a sample request body. Paste the copied pet ID to the petId parameter. For the quantity parameter, specify
1. Click Execute to send the request:
Click the image to enlarge it.
On the next step of the tutorial, we will create a test case based on the recorded requests.
4. Create test
After you record the scenario, you can generate a test case:
-
Click Generate services.

Click the image to enlarge it.
-
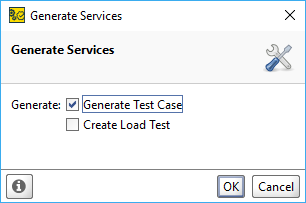
In the Generate Services dialog, check the Generate Test Case option:
-
Click OK and enter the test suite and test case names.
-
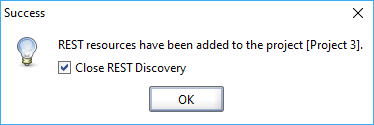
Select Close REST Discovery and click OK:
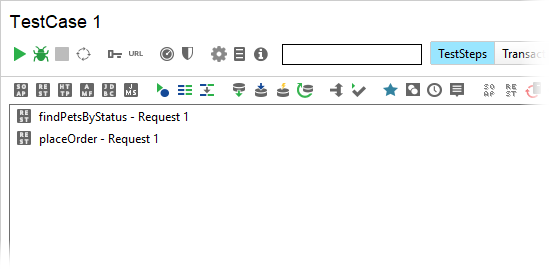
ReadyAPI will create a test case with a sequence of recorded requests: