Running the Utility
To launch the runner from ReadyAPI, right-click a load test in the Navigator and select the launch command from the context menu:
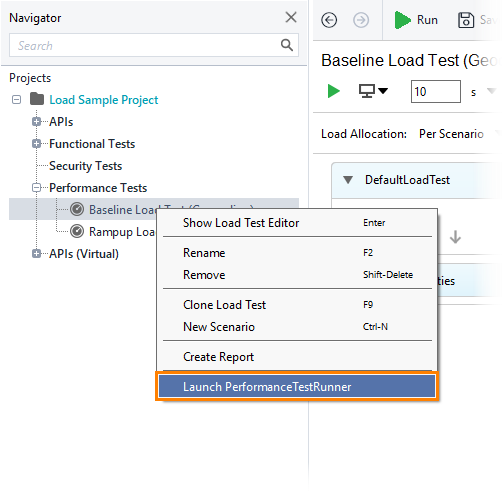
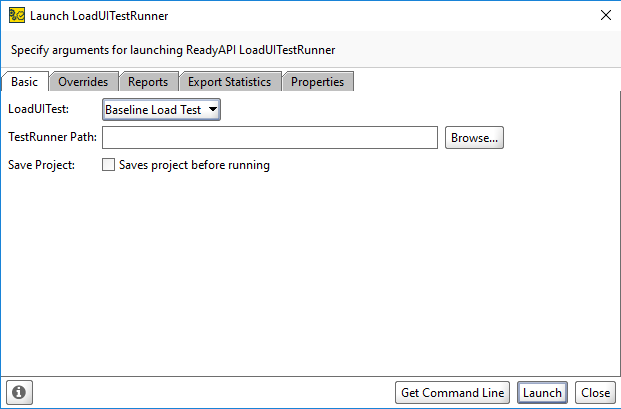
After you selected a menu command, ReadyAPI displays a dialog box, where you can configure the parameters of the run (see below). You can then use the generated command string to run the utility from the command line.
Licensing
The load test runner is installed along with ReadyAPI and uses the same modules. It does not require any special license as it uses the existing ReadyAPI Performance license you have.
Parameters
The configuration dialog organizes the utility parameters in the following tabs:
Basic Tab
| Parameter | Description |
|---|---|
|
LoadUI Test |
Specifies the load test to be run. This parameter is an analogue of the |
|
TestRunner Path |
Specifies the fully-qualified name of the runner file (loadtestrunner.bat or .sh). By default, the file is located in the <ReadyAPI>\bin directory. |
|
Save Project |
Commands ReadyAPI to save the test project before running the test. We would recommend that you select this check box to make sure you are always running the most recent version of your project. The runner works with the settings that it loads from your project file. Until you save changes to the project file on the disk, the runner does not “know” about them. Suppose that you added a new statistics group to the Statistics page of your load test editor. If the check box is clear, and you want to export new statistics data to a file after the test run, the export will not work, because the changes are not in the project file on the disk. Either save your project, or select this check box to save it automatically before the test run. |
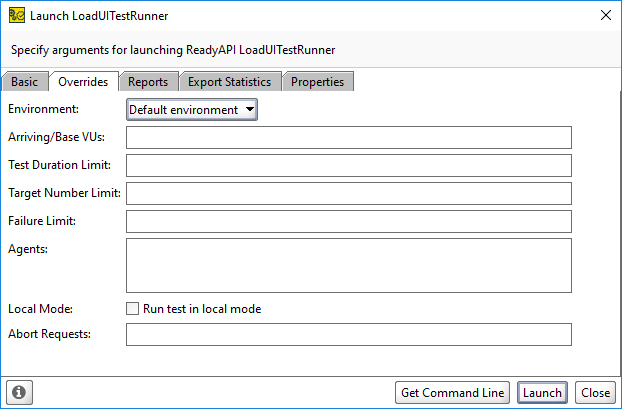
Overrides Tab
| Parameter | Description | ||||
|---|---|---|---|---|---|
|
Environment |
Specifies the environment to be used for a test run. The Environment drop-down list contains the environments that you configured in the Environments dialog. This parameter is an analogue of the |
||||
|
Arriving/Base VUs |
Specifies the number of virtual users for simulation:
This parameter is an analogue of the |
||||
|
Test Duration Limit |
Specifies the maximum allowed execution time for the test in seconds. 0 or an empty value means the limit is not set. This parameter is an analogue to the SECONDS part of the |
||||
|
Target Number Limit |
Specifies the maximum number of runs for the targets (test cases) that are used in your load test. Each test case execution includes the target run counter. If some target runs in a loop, then each iteration increases the target run counter. When the counter exceeds the specified number, the runner stops the test execution. 0 or empty value means the limit is not set. This parameter is an analogue to the TARGETS part of the |
||||
|
Failure Limit |
Specifies the maximum allowed number of error messages. If the number of logged error messages exceeds this value, the runner stops the test execution. 0 or empty value means the limit is not set. This parameter is an analogue to the FAILURES part of the |
||||
|
Agents |
Specifies the remote agents to be used for the test run. Specify each agent on a new line. Use strings of the following format:
Some examples:
You can find the scenario names in the load test editor: 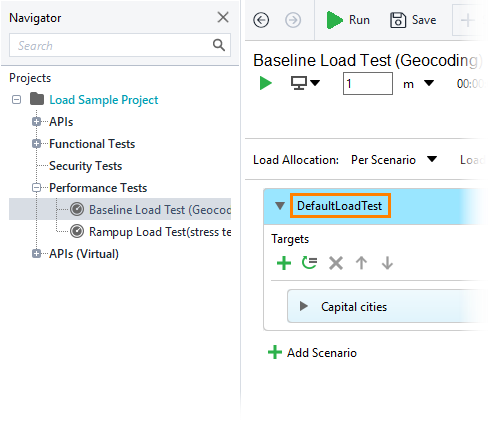 The Agents parameter is significant only if Local Mode is disabled. If Local Mode is enabled, distribution is not used. The Agents parameter overrides the agent settings of your load test that you specify on the Distribution page of the load test editor.
The Agents parameter is an analogue of the To use load distribution, you need a ReadyAPI Performance license. To try how it works, sign up for a free trial on our web site. |
||||
|
Local Mode |
If this parameter is enabled, the runner will run all test cases on the local computer. Otherwise, the runner will distribute the test cases among the test agents. If you specify this parameter for the runner, it will override the Run scenarios... setting of your load test: 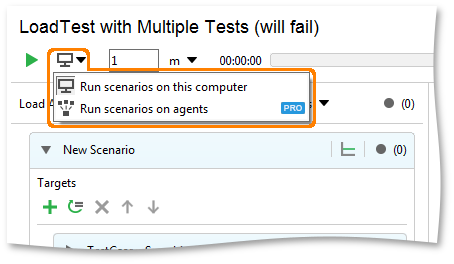 The Local Mode parameter is an analogue of the |
||||
|
Abort requests |
Specifies how the test runner will handle requests running at the moment when stopping the test. Can be
This parameter is an analogue of the |
Reports
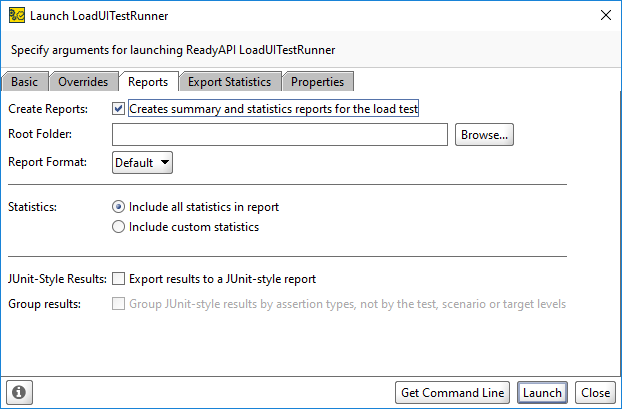
| Parameter | Description | ||
|---|---|---|---|
|
Create Reports |
Commands the runner to save reports to the directory specified by the Root Folder parameter. Along with Root Folder, the Create Report parameter is an analogue of the |
||
|
Root Folder |
The fully-qualified name of the directory that will store exported test reports. If the specified directory does not exist, it will be created.
This parameter is required if you selected the Create Report check box. Along with Create Report, it is an analogue of the |
||
|
Report Format |
Specifies the format of generated reports. Possible values: Default, PDF, XLS, HTML, RTF, CSV, TXT and XML. This parameter is an analogue of the |
||
|
Statistics |
Specifies the statistics groups to be included in the report. By default, all statistics groups are included in the report. To include only some of the groups, select the Include custom statistics option and choose the needed statistics groups. |
||
|
JUnit-Style Results |
Commands the runner to generate a JUnit-style report. |
||
|
Group results |
Commands the runner to group JUnit-style results by assertion types. If it is not selected, the results are grouped by the test, scenario or target level. |
Export Statistics Tab
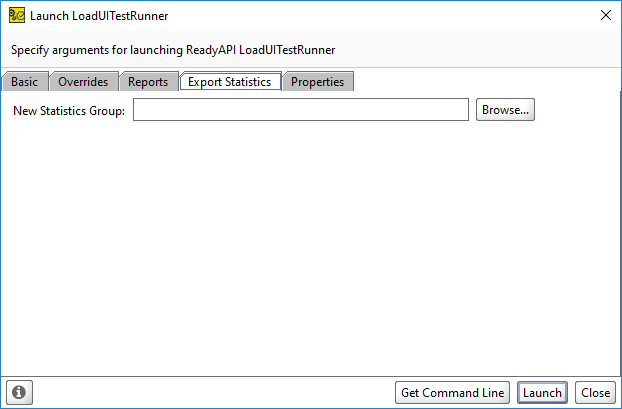
Using the Export Statistics tab, you can save data of statistics groups (charts) to .CSV files.
For each statistics group that you want to export, specify the fully-qualified name of the target file in the corresponding field. Other statistics groups will not be exported.
If the specified file already exists, it will be overwritten.
Parameters of the Export Statistics tab are analogues of the -e, --export command-line argument.
Properties Tab
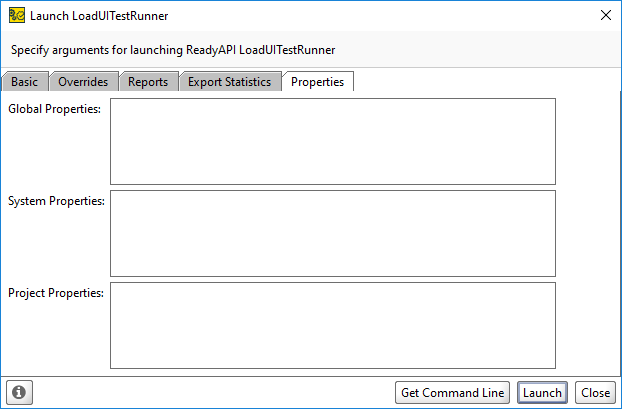
On the Properties tab, you can specify values of the global, system and project variables that will take effect during the test run. The values you specify will override these variable values you have in other ReadyAPI dialogs and panels.
To specify variable values, use strings of the following format: variable-name=value.
Separate multiple name=value pairs with spaces or put each pair into a new line. If a variable name or value includes spaces, enclose the entire pair in quotes. Some examples:
-
sun.cpu.endian=little
-
"Sample Data=C:\Tests\Data"
-
ServiceEndpoint=127.0.0.1:8088
The parameters on this page are analogues of the following command-line arguments:
| Text Box | Command-Line Argument |
|---|---|
|
Global Properties |
|
|
System Properties |
|
|
Project Properties |
|

