| Note: | For more information on the plugin, please refer to SmartBear/ready-websocket-plugin. |
This plugin adds four TestSteps to the functional testing in ReadyAPI:
- Publish: Sends messages to a WebSocket server.
- Receive: Receives and asserts messages.
- Drop: Drops the connection to the WebSocket server.
- Open: Opens a connection to the WebSocket server.
The plugin integrates seamlessly with ReadyAPI features such as property expansion, property transfers, and data-driven testing.
The plugin was inspired by the SmartBear/ready-websocket-plugin, with contributions from its original authors.
Requirements and Installation
This plugin has been tested with the following versions:
- SoapUI 5.7.2
- ReadyAPI 3.53.0
Working with the JIRA plugin
Install the plugin via the Plugin Manager in ReadyAPI.
For detailed instructions, see the ReadyAPI Plugin Manager guide.
Currently, this plugin is at v2.1.1
WebSocket Test Steps
This plugin adds four WebSocket TestSteps for interacting with WebSocket servers:
- Publish using WebSockets: Publishes a message to the server.
- Receive WebSocket Message: Receives a message from the server.
- Drop WebSocket Connection: Closes or terminates the connection with the server.
- Open WebSocket Connection: Opens a connection to the server.
Lifetime of WebSocket Connections
WebSockets are full-duplex, single TCP socket connections that allow simultaneous communication in both directions. Messages can be published and received on the same connection.
In a TestCase, WebSocket TestSteps are used, and open WebSocket connections are cached for reuse. Each WebSocket TestStep checks the cache for an existing connection by name. If a matching open connection is found, it will be used; otherwise, a new connection will be established and cached. Once the TestCase completes, all open WebSocket connections will be closed.
| Note: |
|
Configure WebSocket Connections
Before starting, specify the WebSocket server and configure the connection settings. Each WebSocket TestStep includes a Connection combo-box where you can choose an existing connection or select <New Connection…> to create a new one.
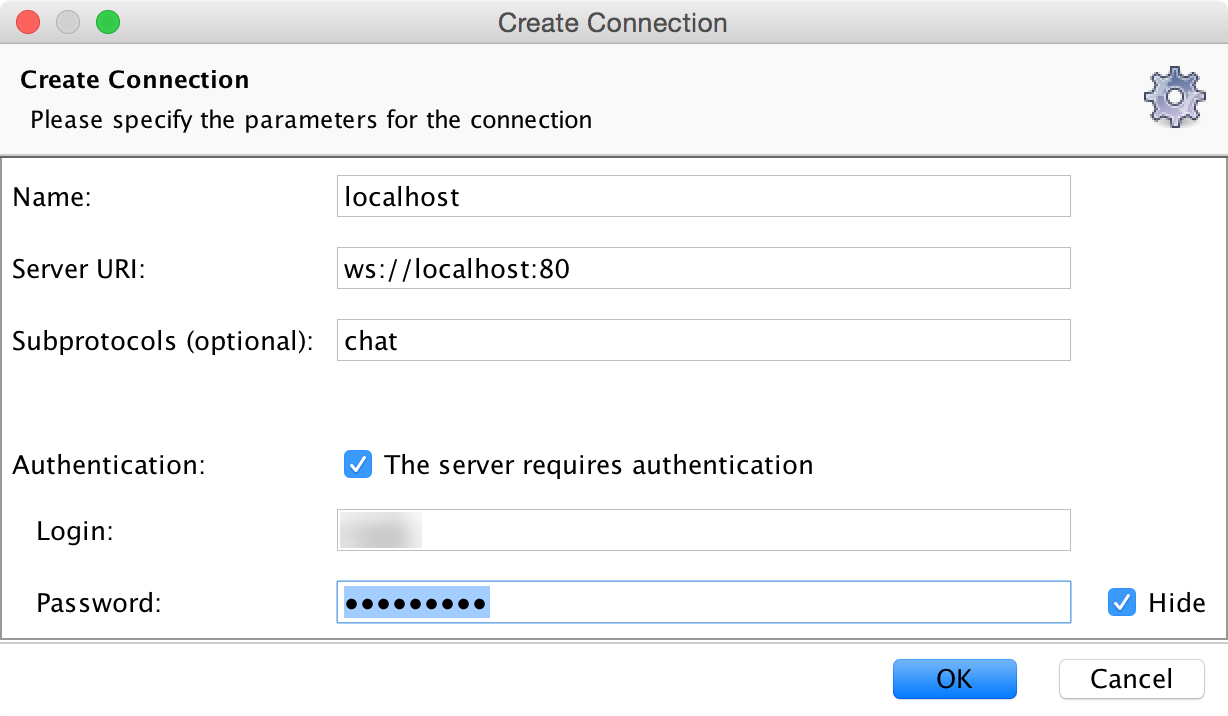
The Create Connection dialog will appear, where you will need to provide the following settings for the connection (note that only project-level property expansions will work correctly for connection settings):
| Setting | Description |
| Name | A unique identifier for the connection, visible in the "Connection" combo-box in test steps. |
| Server URI | A unique identifier for the connection, visible in the "Connection" combo-box in test steps. |
| Sub-protocols | Optional sub-protocols for the WebSocket upgrade request, entered as a comma-separated list. |
| Authentication | Check this if the WebSocket server requires authentication. |
| Login and Password | Required if authentication is enabled. |
| Hide | If unchecked, the password is visible. Check to hide the password. |
Once you click OK to close the Create Connection dialog, the connection will be assigned to the current test step. To reuse the connection in other test steps, select it from the Connection combo-box in the test step editor.
Managing Connections
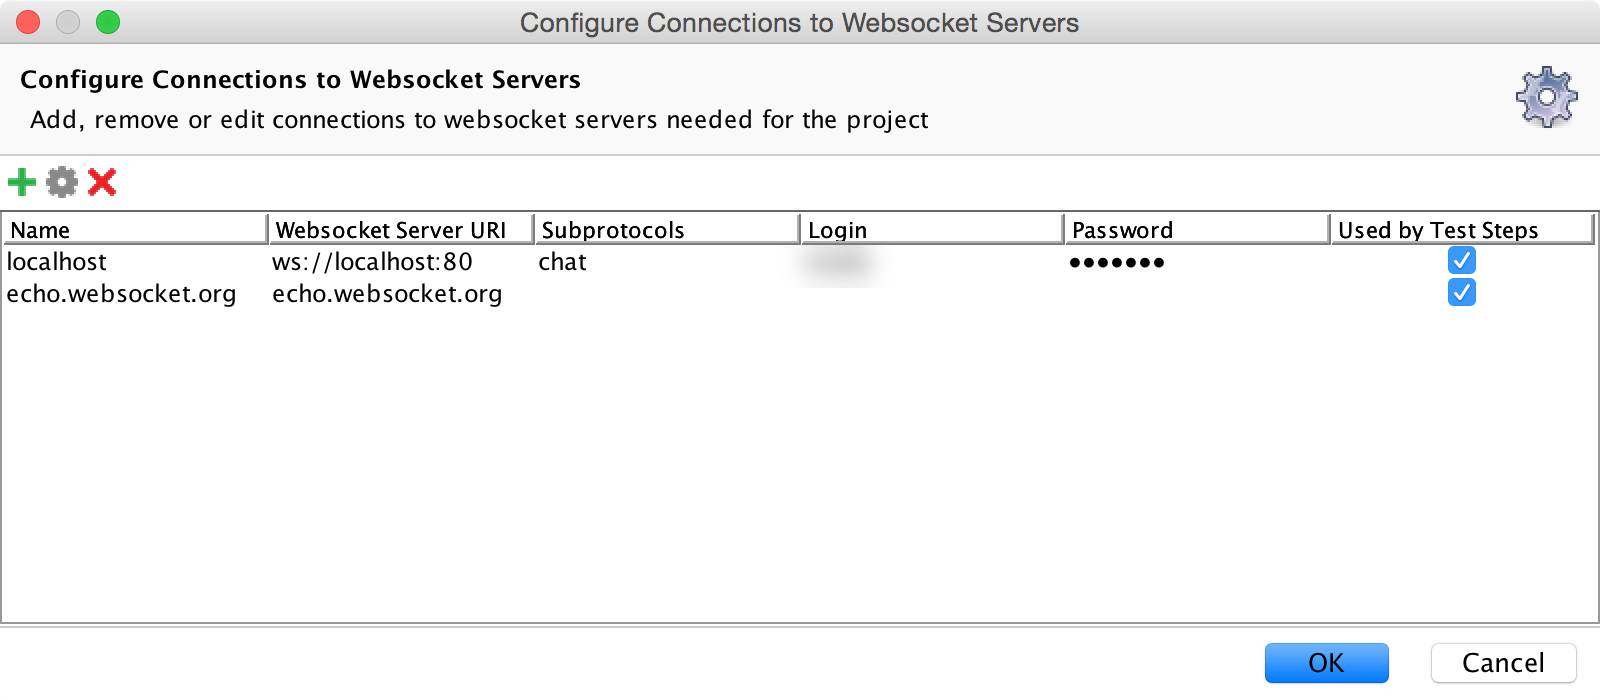
To view or remove project-related connections, open any Publish or Receive test step editor and click the Configure WebSocket Connections of the Project toolbar button. This will open the Configure Connections to WebSocket Servers dialog, where you can manage all connections for the project.
WebSocket Test Steps
Publish Using WebSockets
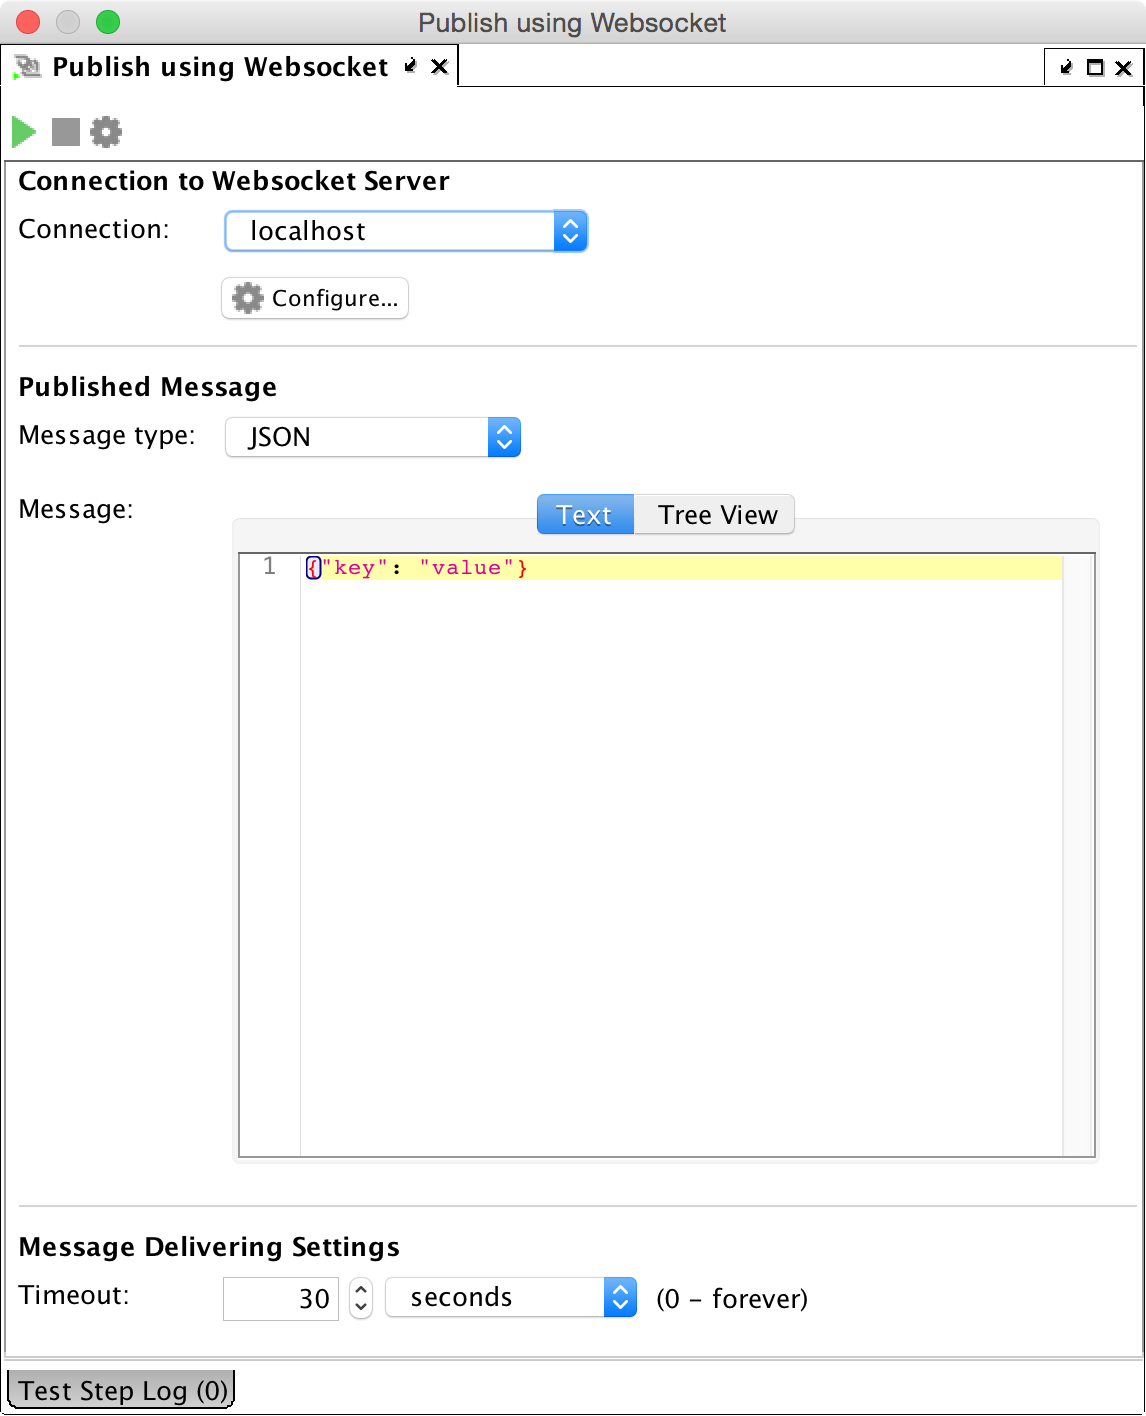
This test step publishes a message to the selected server.
| Setting | Description |
| Connection | Select the WebSocket server or choose <New Connection…> to create a new connection for this test step. |
| Configure | Click this button to customize the selected connection. The Configure Connection dialog will appear. |
| Message Type |
Select the type of message to publish. Available options:
|
| Message | Enter the payload for the message you want to publish. |
| Timeout | Set the time limit for the test step. If the connection cannot be established or the message cannot be sent within the specified period, the test step will fail. |
Receive WebSocket Message
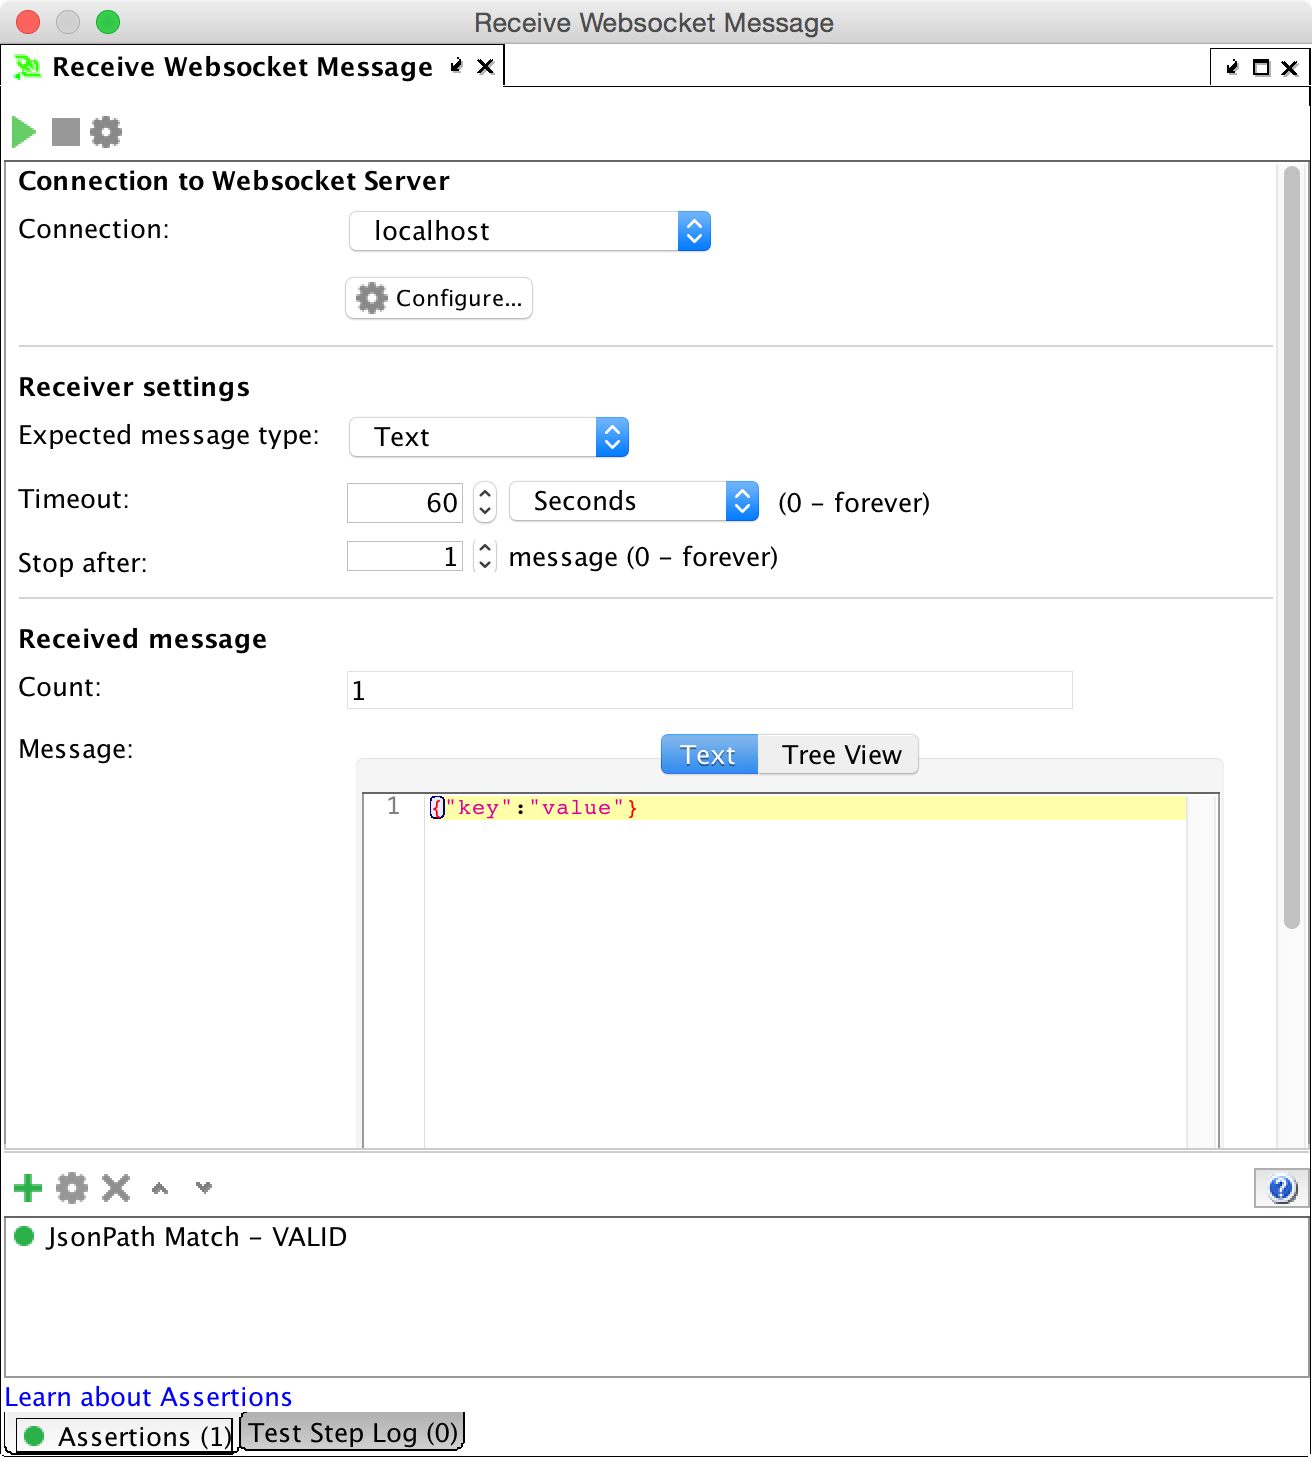
This test step waits for a message from the WebSocket server and optionally asserts the message.
| Setting | Description |
| Connection | Select the WebSocket server or choose <New Connection…> to create a new connection for this test step. |
| Configure | Click to customize the selected connection. The Configure Connection dialog will appear. |
| Expected Message Type |
Specify the expected type for the received message. Available options:
|
| Timeout | The test step will fail if a valid message isn't received within a specified period. |
| Stop After | The test step will stop receiving after the specified number of messages. |
| Count | The total number of messages processed by the WebSocket client. The client may continue receiving additional messages before it is stopped. |
| Received Message | Displays the payload of the received message from the WebSocket server. |
| Assertions | If assertions are present, they will be applied to the received stream of messages. The test step succeeds only if all assertions match. Without assertions, the first received message is valid. |
Drop WebSocket Connection
This test step disconnects from the WebSocket server, useful when testing scenarios with dropped connections. This step has no effect during a LoadTest.
| Setting | Description |
| Connection | Select the WebSocket server or choose <New Connection…> to create a new connection for this test step. |
| Configure | Click to customize the selected connection. The Configure Connection dialog will appear. |
| Drop Method |
Choose the method for disconnecting the WebSocket connection:
|
Open WebSocket Connection
This test step connects to the WebSocket server, useful for testing scenarios where connections should be created before any other non-WebSocket test step.
| Setting | Description |
| Connection | Select the WebSocket server or choose <New Connection…> to create a new connection for this test step. |
| Configure | Click to customize the selected connection. The Configure Connection dialog will appear. |
| Timeout |
The test step will fail if the connection cannot be established within the specified period. |


