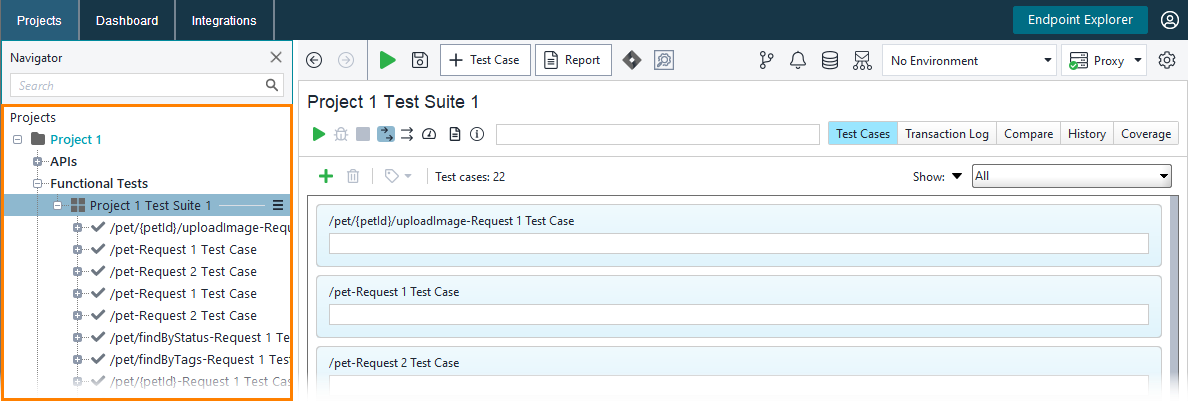
You can see the created test project in the Navigator panel on the left:
The project has multiple test cases (one per each operation). They are all grouped into a test suite, which, in its turn, belongs to the project.
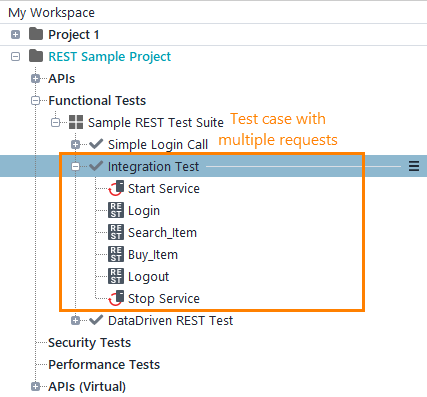
In our case, each test case has only one request test step. In real life, your test cases will typically have multiple steps:

We will explain how to add requests to a test case on the next step of this tutorial.
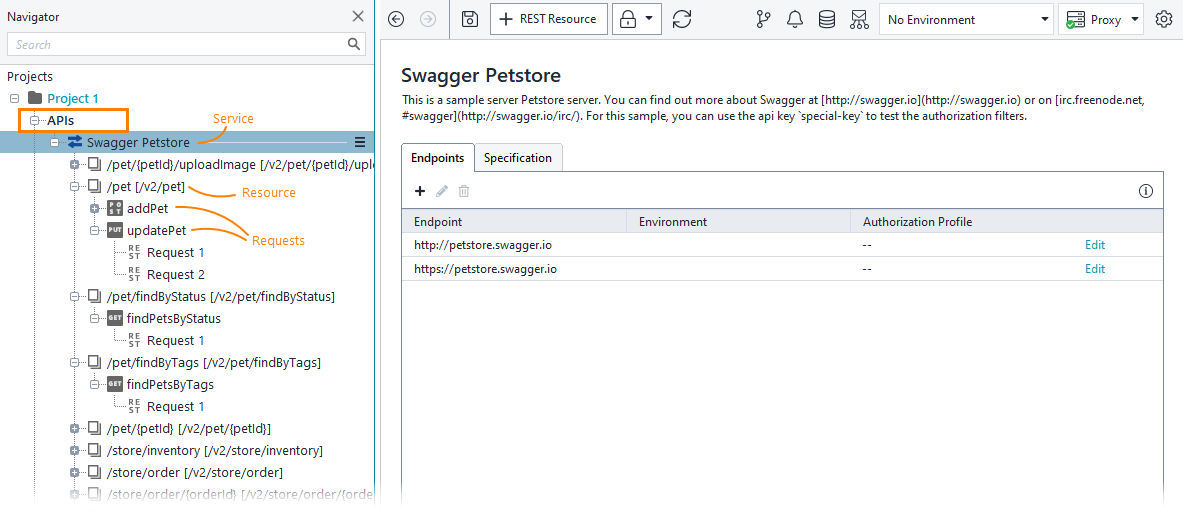
To explore the service, expand the APIs node in the Navigator panel. You will see a tree-like structure of the service’s resources and requests:
The topmost node corresponds to a web service. Its child nodes correspond to resources. The resource nodes, in their turns, have child nodes that match requests that are defined for a resource in the web service specification.
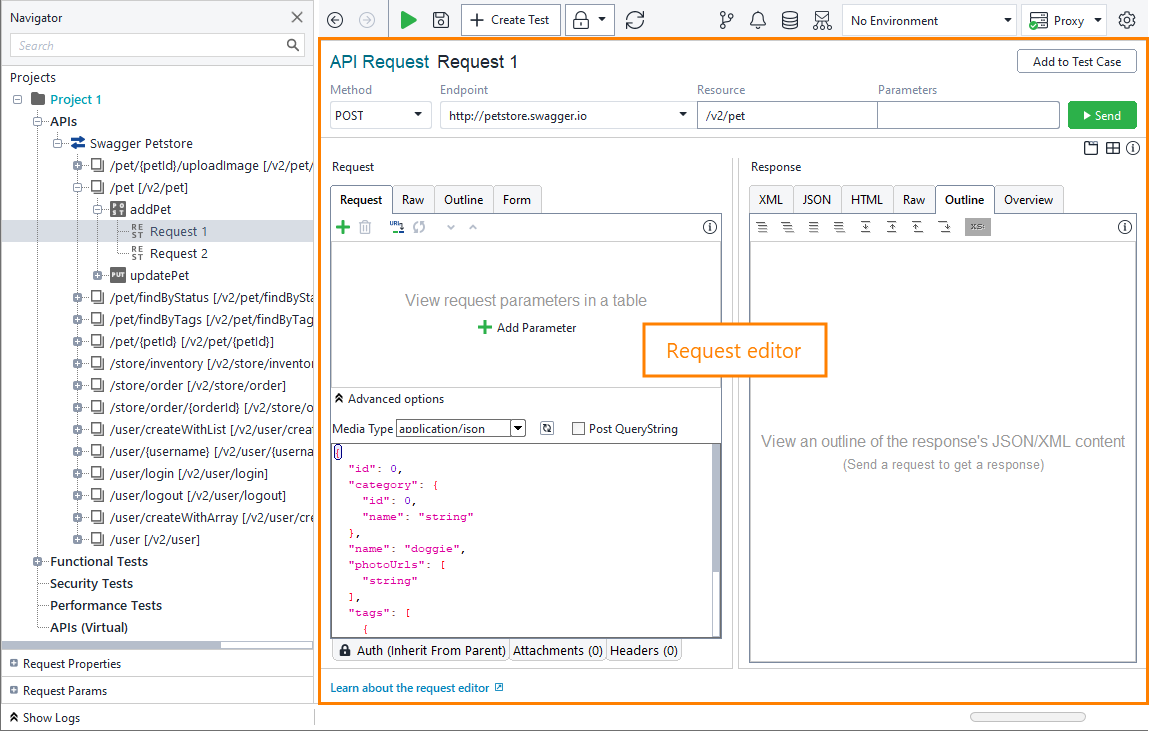
Use the editor on the right to view parameters of the selected service, resource or request.
Some resources have multiple requests defined. These requests typically have different HTTP methods. Some other resources have only one request. The requests that you see in the tree in APIs serve as template requests. For example, you can set different parameters in each request here and then use these requests as a base for your request test steps in the Functional Tests node.
In your project, you can create as many templates for a request as needed.
You can also run a request from the request editor to check if this request works correctly. Note, however, that this will be an individual request run. To simulate a real scenario, you need to run a test case with multiple requests.
On the next step of the tutorial, we will add a request to a test case and modify request parameters.


