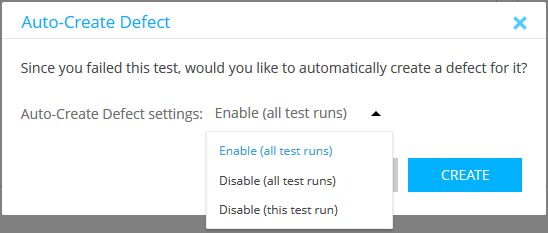
If any of steps in the test run fails, the Auto-Create Defect dialog will appear after the test run end.
Click Create to create a new defect and open the Add Defect form, or Don't Create to return to the test run.
In this dialog, you can also configure the behavior of the Auto-Create Defect dialog in the Auto-Create Defects settings drop-down list:
-
Enable (all test runs) – The dialog will appear after every failed test runs.
-
Disable (all test runs) – The dialog will not appear after failed test runs for the current user.
Tip: To turn this option on or off, go to > Setup > System Configuration > System Options. -
Disable (this test run) – For test sets: the dialog will not appear after subsequent runs of tests within the current test set.
Add Defect Form
In the Add Defect form, you can edit the details of the defect and add the necessary information for your team. The value of the Steps to Reproduce field contains the following information about each step:
- The number of the step.
- The status of the step.
- The description of the step.
- The values of the Expected Result and Actual Result fields.
| Note: | For more information about the Create Defect form, see Add and Edit Defects. |
Click Submit after you specify all the necessary information. The new defect will be automatically linked to the test, test set, and release.

