The calendar feature allows teams to share calendars and keep all their appointments and to-do list items on-line.
To access your calendar, select Calendar in the Home, Contacts, or Shared Documents drop-down menus on the main toolbar of QAComplete.
To add a new appointment:
-
Click New Appointment on the toolbar.
-
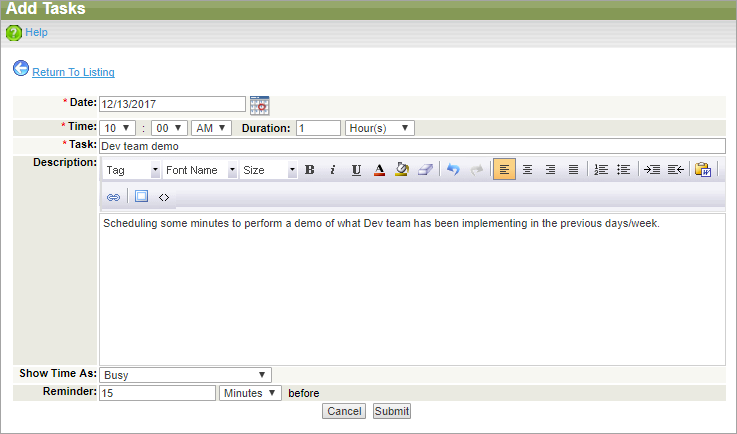
Specify appointment details:
-
Date – Required. Set an appointment date manually (use the
MM/DD/YYYYformat) or pick up it by clicking .
. -
Time – Required. Set an appointment start time.
-
Duration – Specify how long the appointment will continue.
-
Task – Required. Enter an appointment purpose.
-
Description – Enter some information about the appointment.
-
Show Time As – Select your availability status during the appointment. Possible values: Blocked (Private Appointment), Busy, Free.
-
Reminder – Set the time to be notified before the appointment.
-
-
Click Submit.
You can also switch between daily and monthly view with the corresponding buttons on the toolbar and manage your appointments.


