With security groups, you can grant your team members different permissions for different projects. For example, you may want to grant one team Read Only access to data in one project, but full permission to all data in a different project.
The first step in establishing security is to determine the roles of your teams. You have different types of teams in your organization (security administrators, project managers, analysts, programmers, testers, sales people, marketing personnel, documentation specialists, and so on). Each of these team roles may have different security needs: a project manager may need full rights to all areas, where a sales person may need more limited rights.
| Note: | New features are frequently controlled by a new security setting. Security permission is off by default when new features are deployed, since we cannot predict which of your security groups should have access. When new features are available, make sure your security administrator enables permission to the features for your security groups. |
Set up security groups
Once you determine the various roles for your teams, define the security groups that represent those roles. Each group is a set of security rights for that role. You may have a few security administrators, a few project managers, many programmers and testers. Each team member will be assigned to a specific security group for each project.
To start working with security groups, go to > Setup > Security > Security Groups.
Below is a sample Security Groups list:
The number of users in the group appears in the #Users column.
Add a security group
Click Add New to create a new security group. Give your security group a name and an optional description and click Submit. The created group will appear in the Security Groups list.
Set security privileges
Once a security group is created, you can set the security rights for that security group.
-
Click the
 icon next to the needed group.
 -
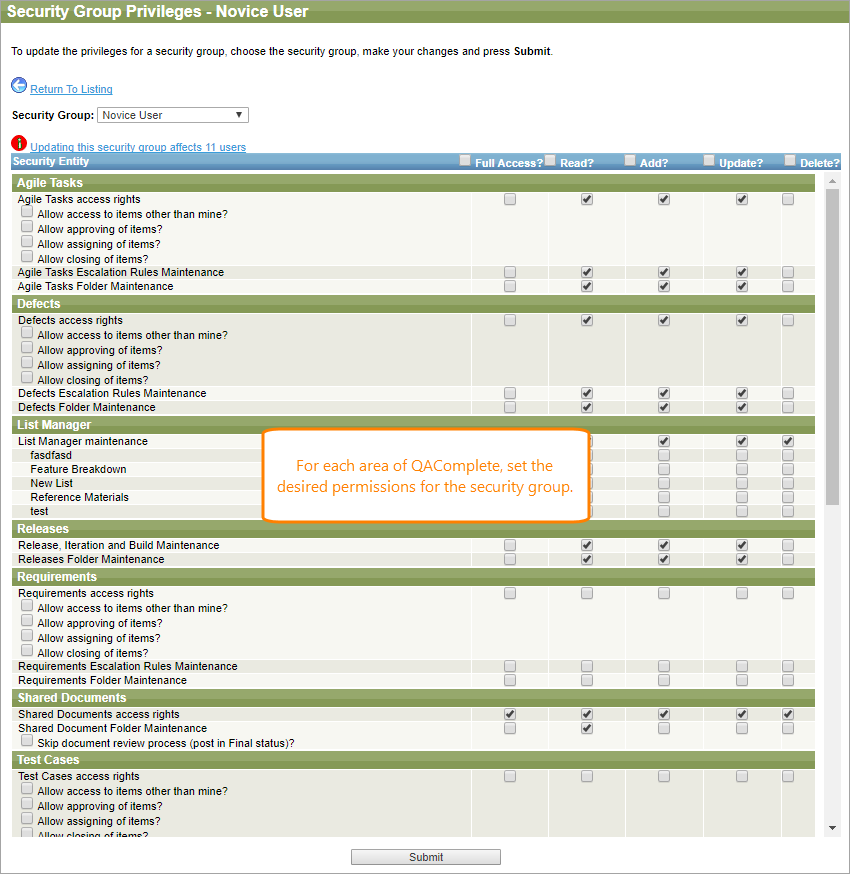
In the subsequent Security Group Privileges form, define the permissions for the group.
-
Click Submit.
Each security area has a block of check boxes for security settings.
The top row of check boxes is used for Full Access, Read, Add, Update, and Delete privileges.
Another set of check boxes determine additional privileges:
-
Allow access to items other than mine – Select, if the users are allowed privileges to items owned by or assigned to other users.
-
Allow approving of items – Select, if the users are allowed to change the status to Approve or Reject. If not selected, the user cannot see nor select any status that contains the text Approve or Reject.
-
Allow assigning of items – Select, if the users are allowed to assign items to other users.
-
Allow closing of items – Select, if the users are allowed to change the status to Closed. If not selected, the user cannot see nor select any status that contains the text Closed.
The next two rows of check boxes determine the privileges for escalation rules and folder maintenance. You can set the privileges to Full, Read, Add, Update, Delete for escalation rules and folder maintenance for each area.
After you complete defining the security permissions for the group, click Submit. You can now put your users into the new group for the desired projects.


