With escalation rules, you can escalate the priority, assignment, and other information for requirements, tests, defects, contacts, and tasks once specific criteria is met. For example, you might consider creating an escalation rule that is invoked when an active defect is assigned but not updated for 2 days. When the rule is triggered, it can automatically send an email to the owner, assignee, or specific people on your team. You can also set the rule up so that it automatically changes information on the defect record (like the assignee, priority, and so on).
QAComplete will process escalation rules on a daily basis. You can turn off the automatic emails by week day in System Options if you do not want the automatic emails to be sent on weekends.
To define escalation rules:
-
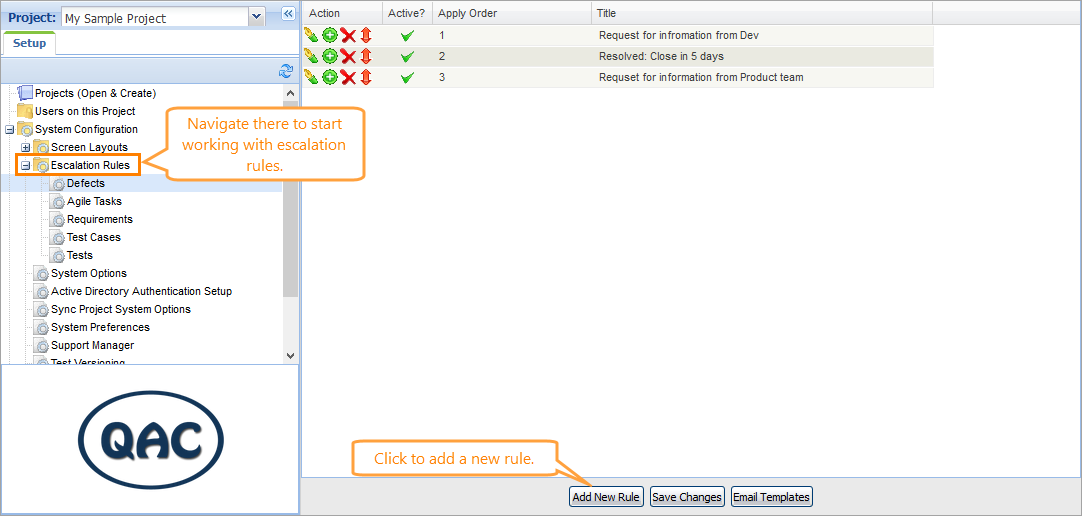
Go to > Setup.
-
Click System Configuration > Escalation Rules, and then select the area you wich to create a rule for:
-
Click Add New Rule. This will take you into a wizard that allows you to define your escalation rule.
-
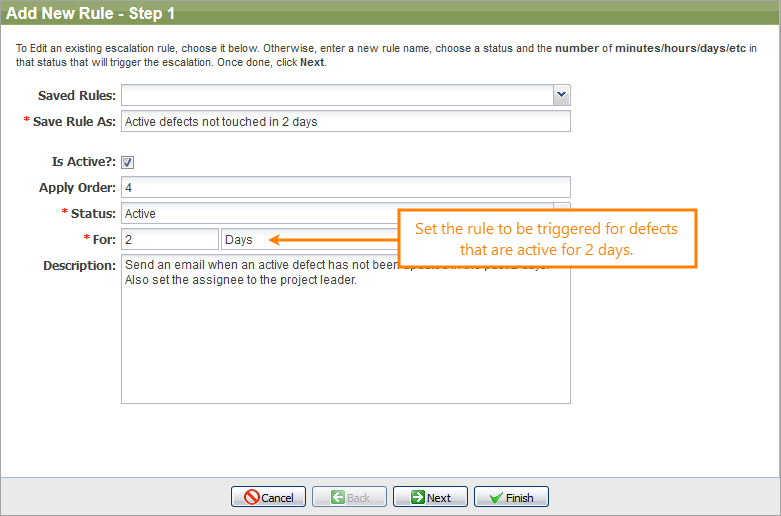
On the first page of the wizard, name the rule and set the status and the duration in which the item stays in that status that will cause the escalation rule to be triggered. For example, if you wish to have the rule triggered when a defect has been in Active status for 2 days, you will set it up as shown below.
-
Click Next and go to the next page of the wizard.
-
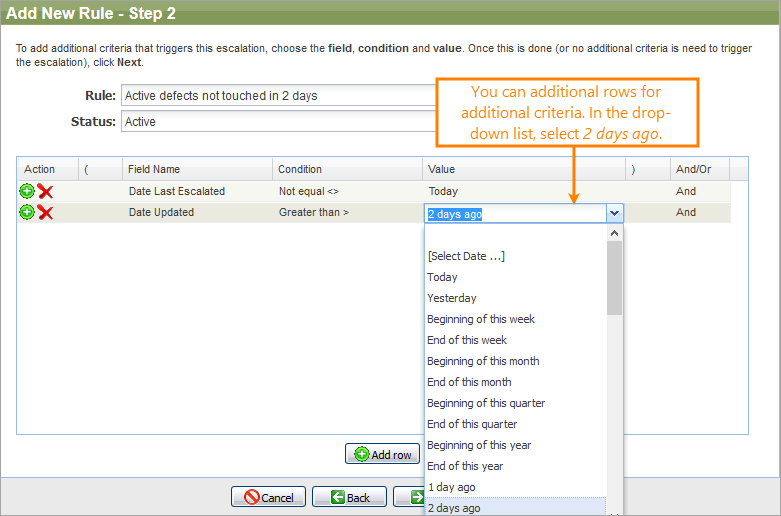
From here, you can add additional criteria for the escalation. In our case, we will add criteria to the rule to exclude any items that have been escalated today and whose last update has been made in the past 2 days:
-
Click Next and go to the next page of the wizard.
-
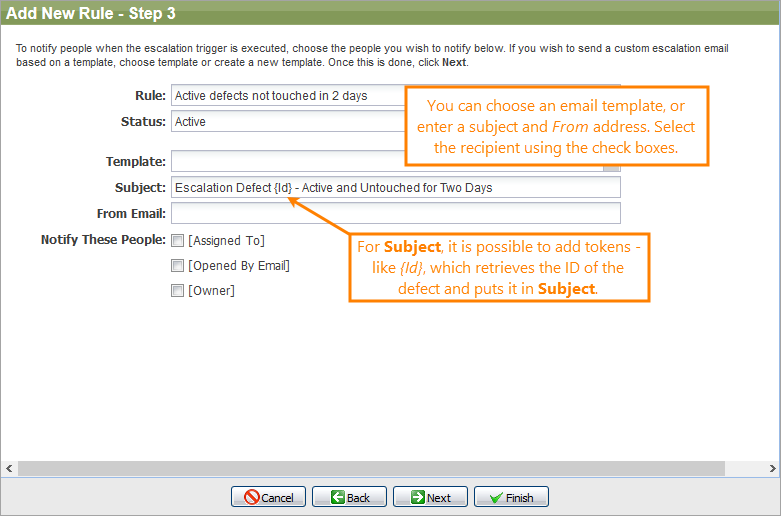
From here, you can choose to send an email when the rule is triggered. If you have created an email template (in System Configuration > Escalation Rules > [Area] > Email Templates), you can use that email template. Otherwise, you can simply enter an email subject and choose who to notify. If you do not wish to send an email when the escalation rule is triggered, leave this screen blank and click Next.
-
Click Next and go to the next page of the wizard.
-
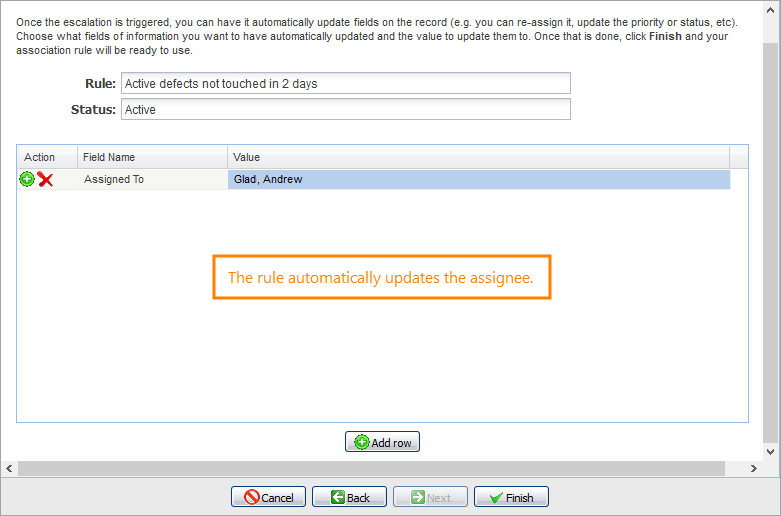
From here, you can have the escalation rule automatically update any fields on the record upon triggering the rule. In the example below, it will automatically update the assignee when the rule is triggered.

