This topic describes how you can customize think time delays in your website load tests.
About Think Time
When recording a scenario, LoadComplete records the time you spend on web pages - periods between the moment when a web page is fully loaded and the moment when you start opening a new web page. These periods are called page think time.
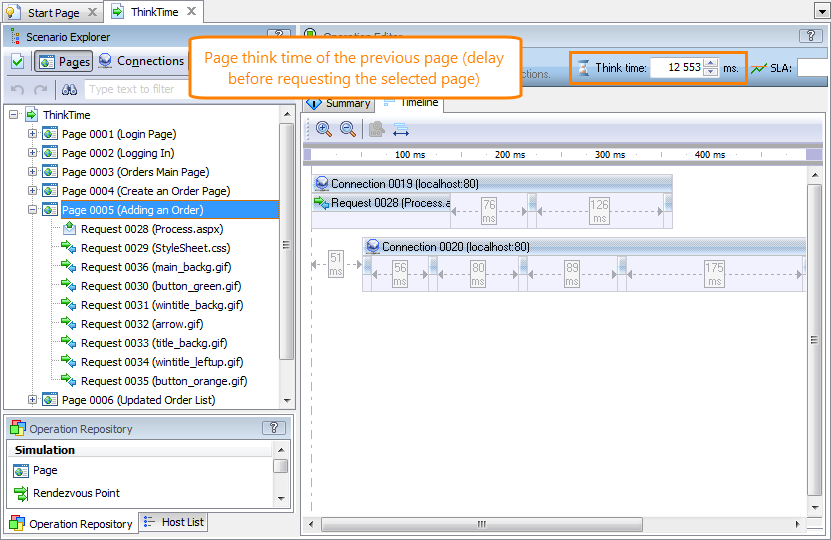
LoadComplete records the page think time as a delay at the beginning of a page. You can view it in the Think Time box at the top of the operation editor when you select a page following the needed page in your scenario:
You can customize page think time to make simulation close to real life.
| Note: | LoadComplete also records a think time for individual requests. To learn how to view and modify this think time, see Changing Think Time for Pages and Requests. |
Why Think Time Is Important
LoadComplete re-uses a recorded think time during the load test run. For example, if you have spent two minutes on a web page during load test recording, each virtual user will also “spend” two minutes on this page during the test playback. If you clicked a link right after a page finished loading, virtual users will perform the corresponding request just as quickly.
However, it is unrealistic for various users to have exactly the same think time for pages because people perceive and process information at different speeds.
To make website load testing closer to real-life conditions, we recommend that you use random think time for pages in your load tests, so that virtual users make requests at various speeds.
To control how LoadComplete simulates a page think time in your load tests, use the Think Time settings in the Load Test editor.
If necessary, you can also set fixed think time for pages or run your load test without using think time at all.
Setting Think Time Policy
Using Randomized Think Time
-
Open the test in the Load Test editor.
-
Switch to the Think Time tab.
-
Enable the Use random think time option.
-
Specify the range for think time values (in milliseconds).
Using Think Time Defined in Scenarios
-
Open the test in the Load Test editor.
-
Switch to the Think Time page.
-
Enable the Use think time defined in the scenario option.
| Note: | You can modify think time values defined in scenarios if necessary. To learn how to do this, see Changing Think Time for Pages and Requests. |
Using Fixed Think Time
-
Open the test in the Load Test editor.
-
Switch to the Think Time tab.
-
Enable the Use random think time option.
-
Enter the needed think time value in milliseconds in both the From and To settings.
Ignoring Think Time (Using Zero Think Time)
-
Open the test in the Load Test editor.
-
Switch to the Think Time tab.
-
Select the Use random think time option.
-
Set both the minimum and the maximum think time values to 0.
| Note: | We do not recommend that you use zero think time because it will not provide realistic user simulation and will put an abnormal load to the tested web server. However, this can be acceptable in some stress testing cases or if you need to play back your test quickly. |
See Also
Creating and Configuring Load Tests
Think Time Settings
Changing Think Time for Pages and Requests
Load Testing With LoadComplete

 About Think Time