A Login Profile allows you to take screenshots of pages that require a user to be logged in. This only applies to websites where a user can login via an HTML form on the website itself, not for sites requiring Basic/HTTP authentication.
Overview of how login profiles work with screenshots
- The Login URL is loaded in the browser. This can be different from the Screenshot Test URL depending on where the login form can be found.
- The screenshot driver searches for the form fields by the Locators specified for username, password, and submit button. If all fields are found, the login credentials are keyed in and the submit button clicked, else the test is marked as failed.
- If submitting the form causes a new page to load, the process will wait until the page completes. For AJAX-based forms, the system waits 10 seconds by default. (You can increase this time by adding a delay under the screenshots Advanced Options.)
- Since many login forms take the browser to a different page than the one requested for screenshots, the screenshot driver loads the Screenshot Test URL before beginning the actual screenshots.
| Note: | Since the process cannot tell whether or not we are truly logged in, be sure to verify this profile on one browser before running a test with multiple browsers, otherwise you may get unexpected results. |
-
Start a new screenshot test
-
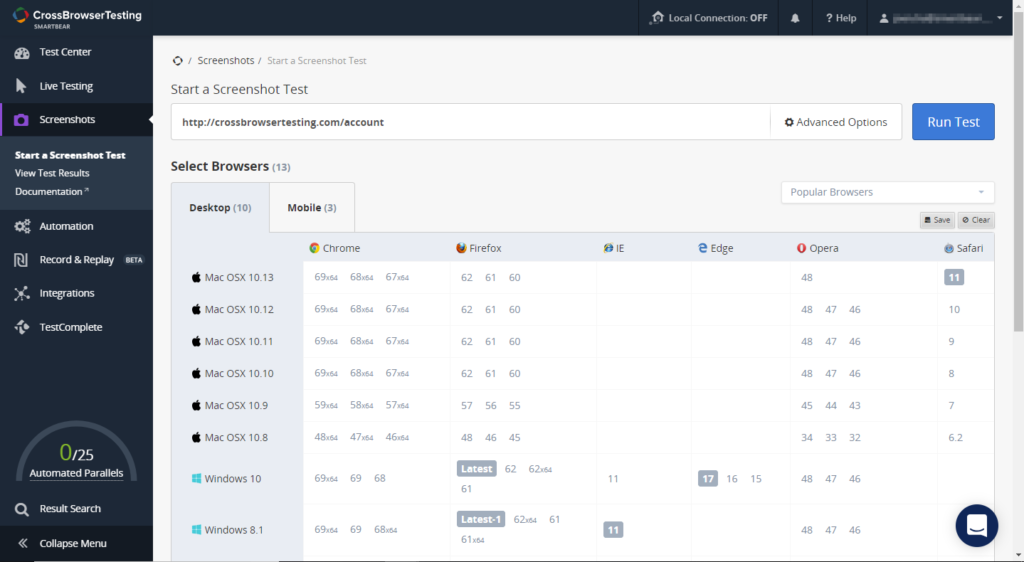
Login to CrossBrowserTesting and click Screenshots at the left side of the app.
-
Enter the URL for the page you would like to take screenshots of.
In this example, we are taking a screenshot of our secure account page.
-
-
Access advanced options
-
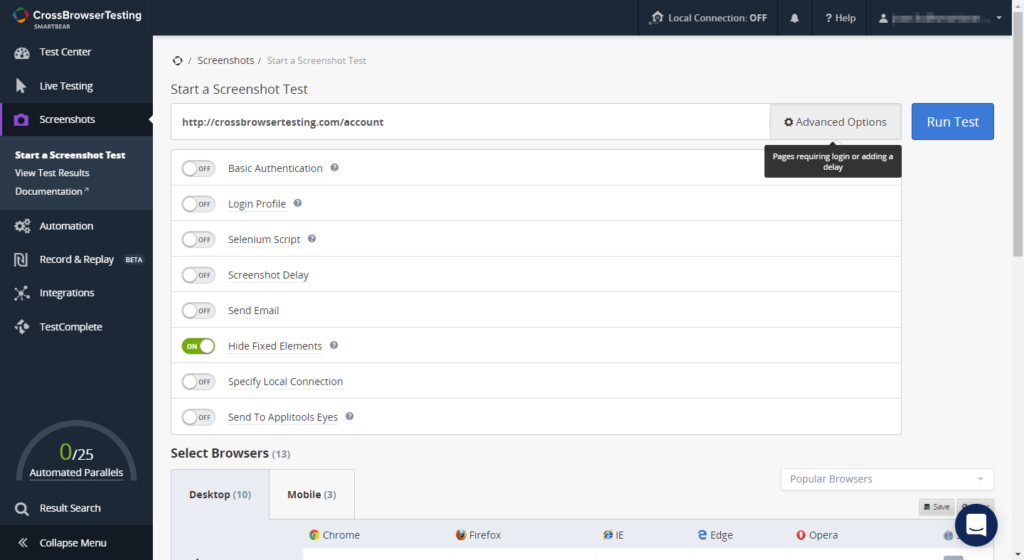
Click the Advanced Options button next to the URL.
-
-
Turn on login profile option
-
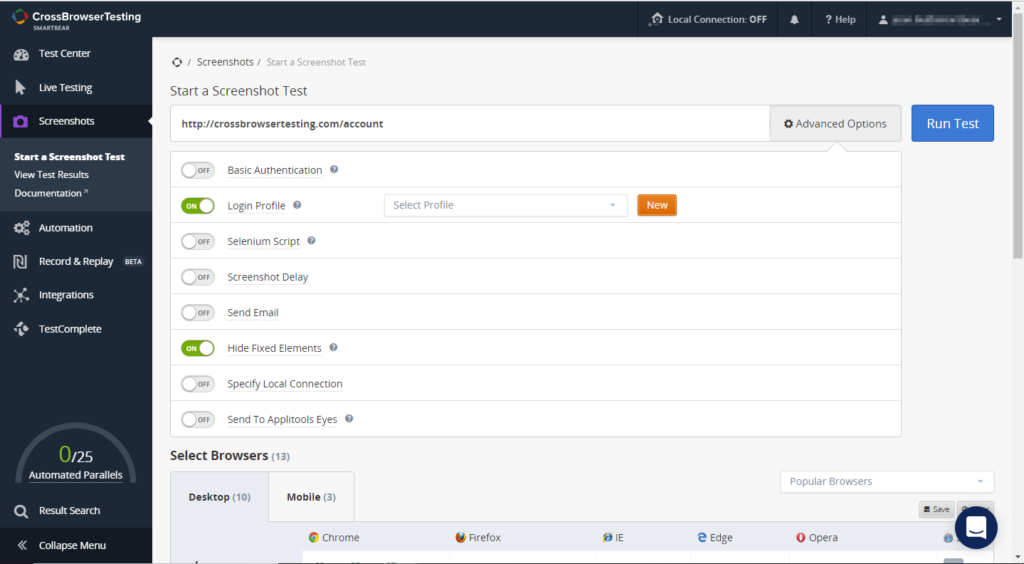
Click the toggle button next to Login Profile option to turn it on. It should now say ON with a green background.
-
Then click the New button to create a new profile which launches a dialog window.
-
-
Enter the login URL
-
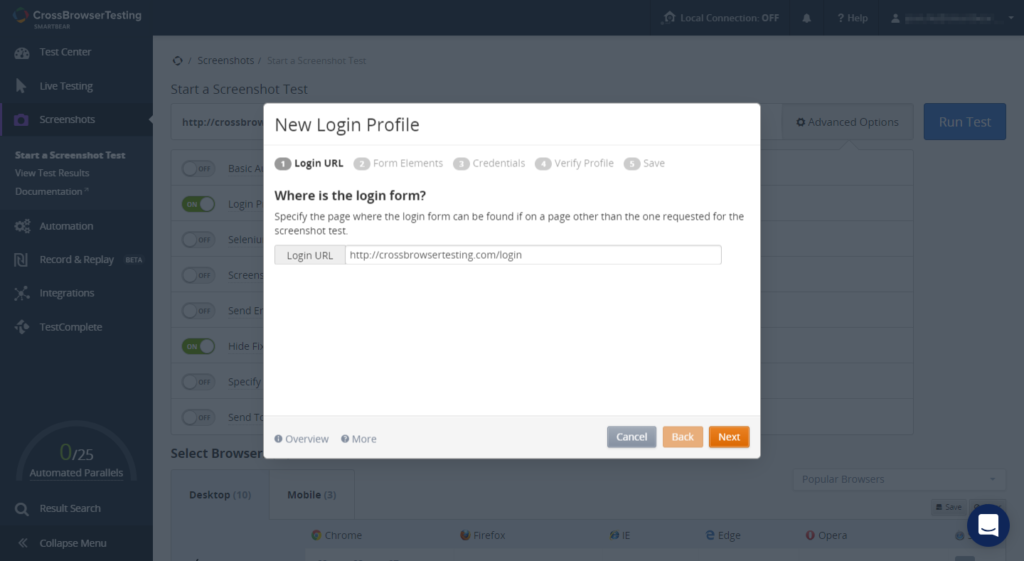
The New Login Profile dialog will appear on the screen.
-
Change the Login URL to point to the path where your login form can be found and then click Next. (We recommend changing this even if the web server will redirect to the link by itself.)
Since the login page for the entire CrossBrowserTesting website is always at /login, we change the login profile's URL to use this path. This means we can use this same login profile for future screenshot tests for any page on our site.
-
-
Find missing locators
-
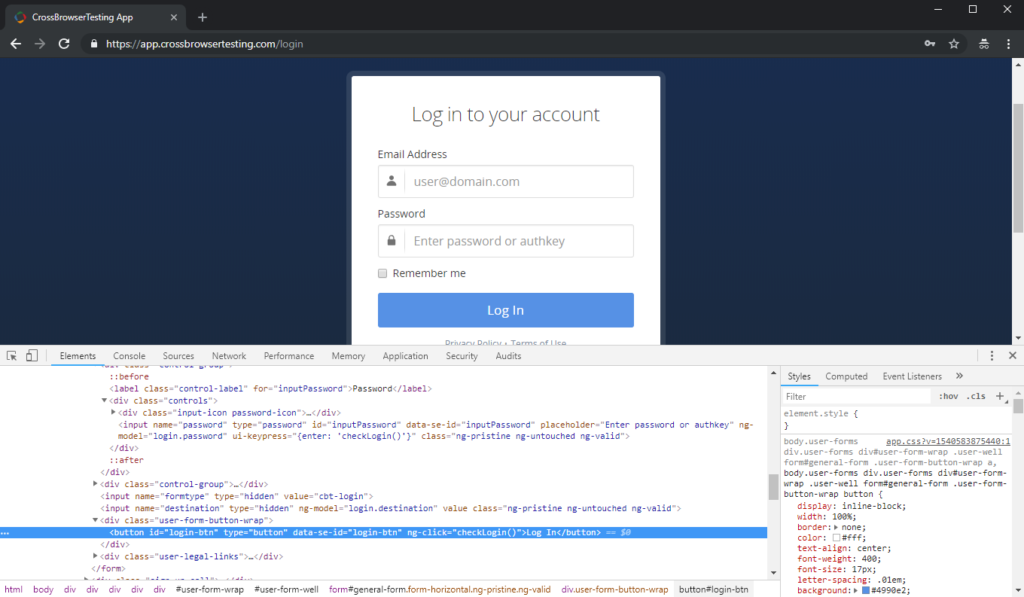
Looking at the source HTML for our login page, we can see that the Submit button has the attribute
id="login-btn". -
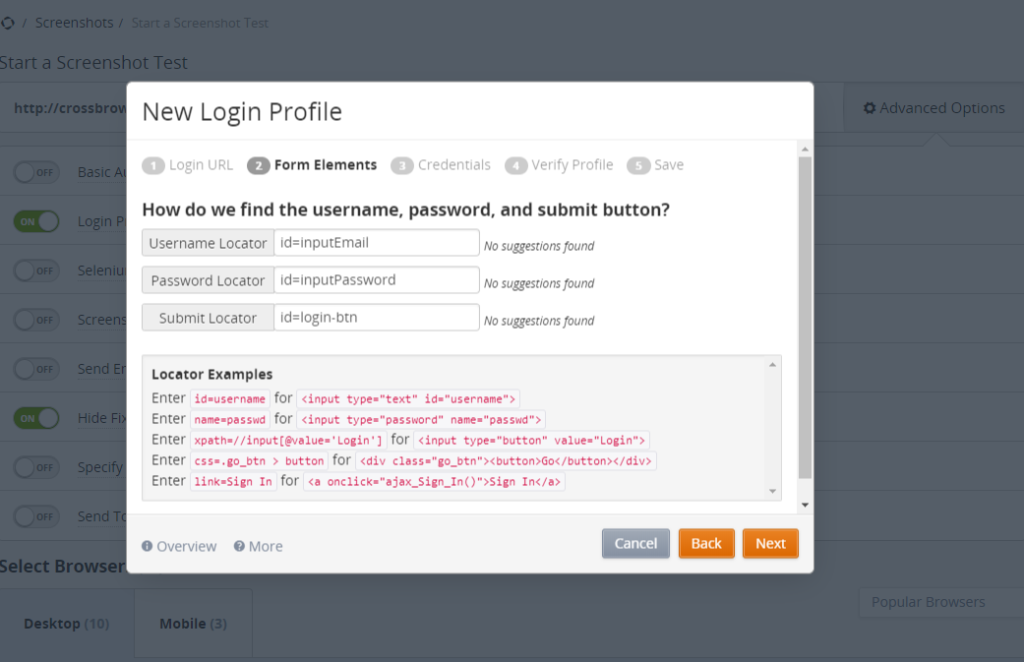
We manually enter this locator for the Submit button as:
id=login-btn(Do not use quotes!). -
The format for entering locators is 'attribute=value'. Additional examples can be found here: Specifying Element Locators.
-
Once all locator options have been filled in, click Next.
-
-
Enter username and password
-
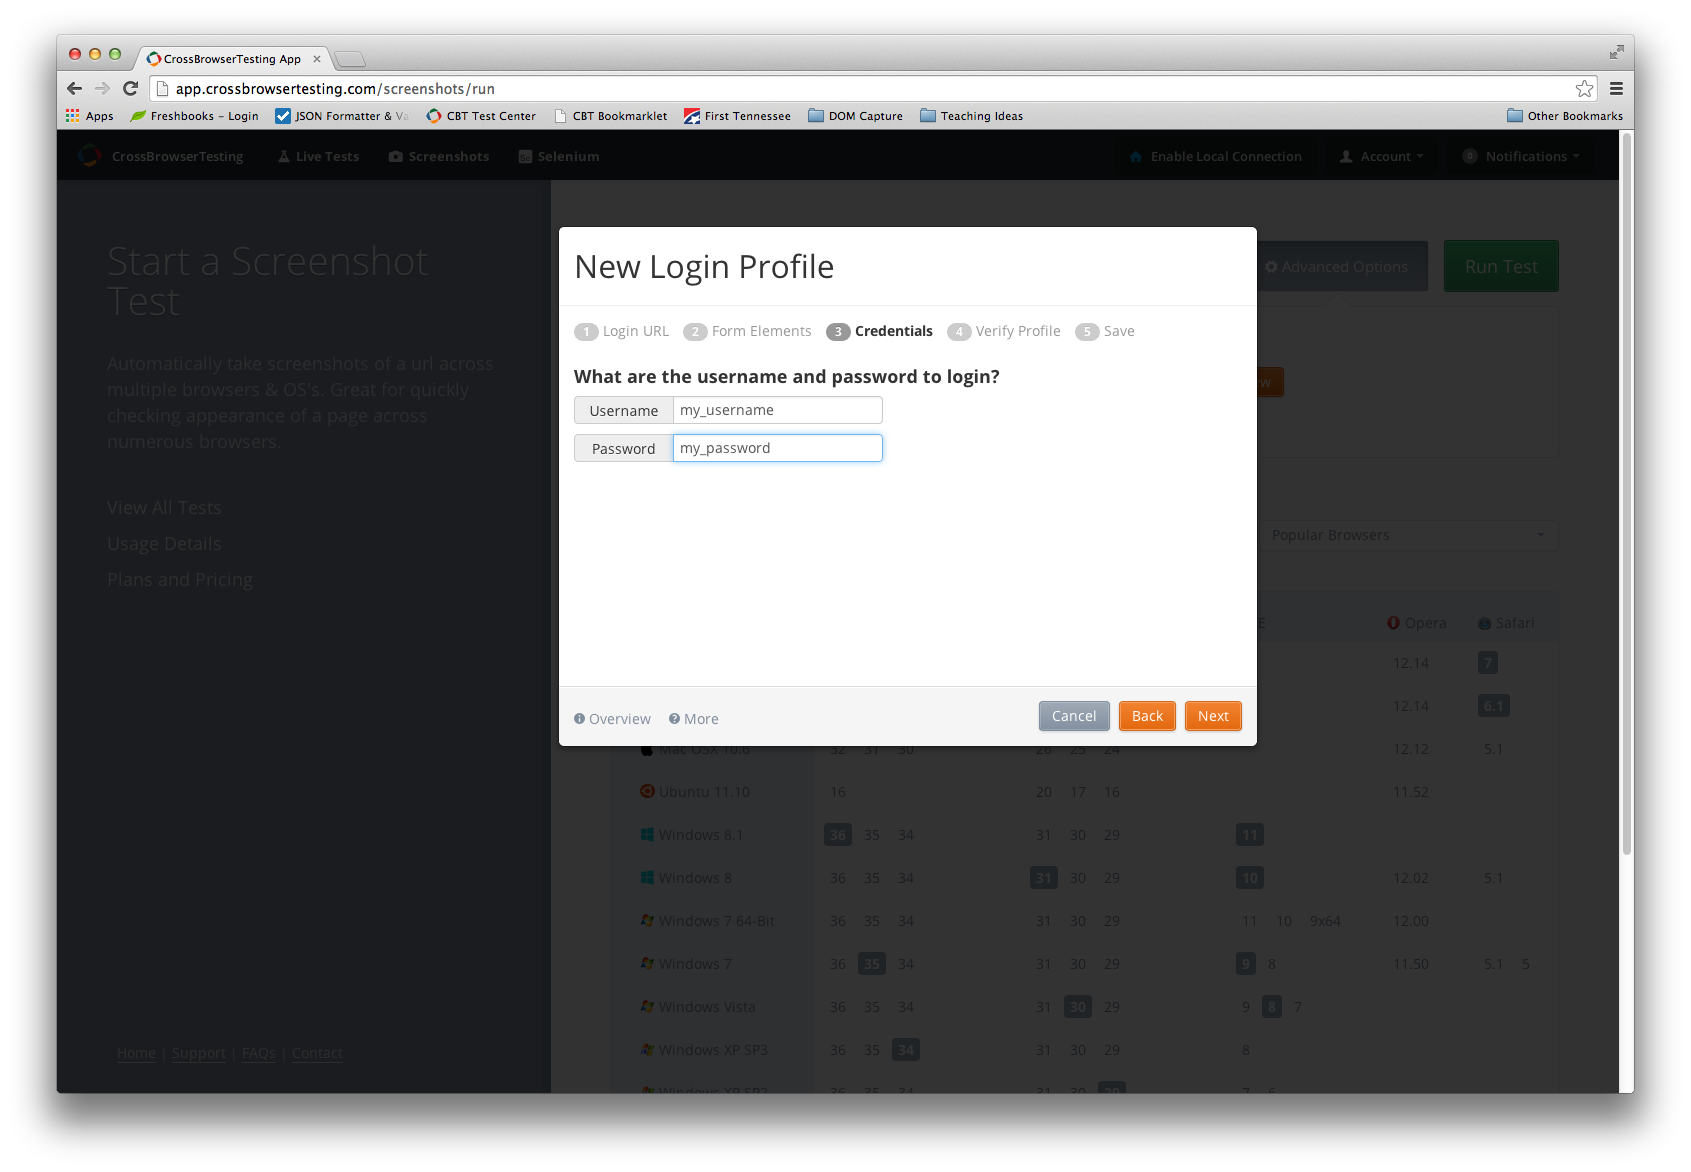
Next we enter our username and password for logging in to the website and click Next.
-
-
Review profile
-
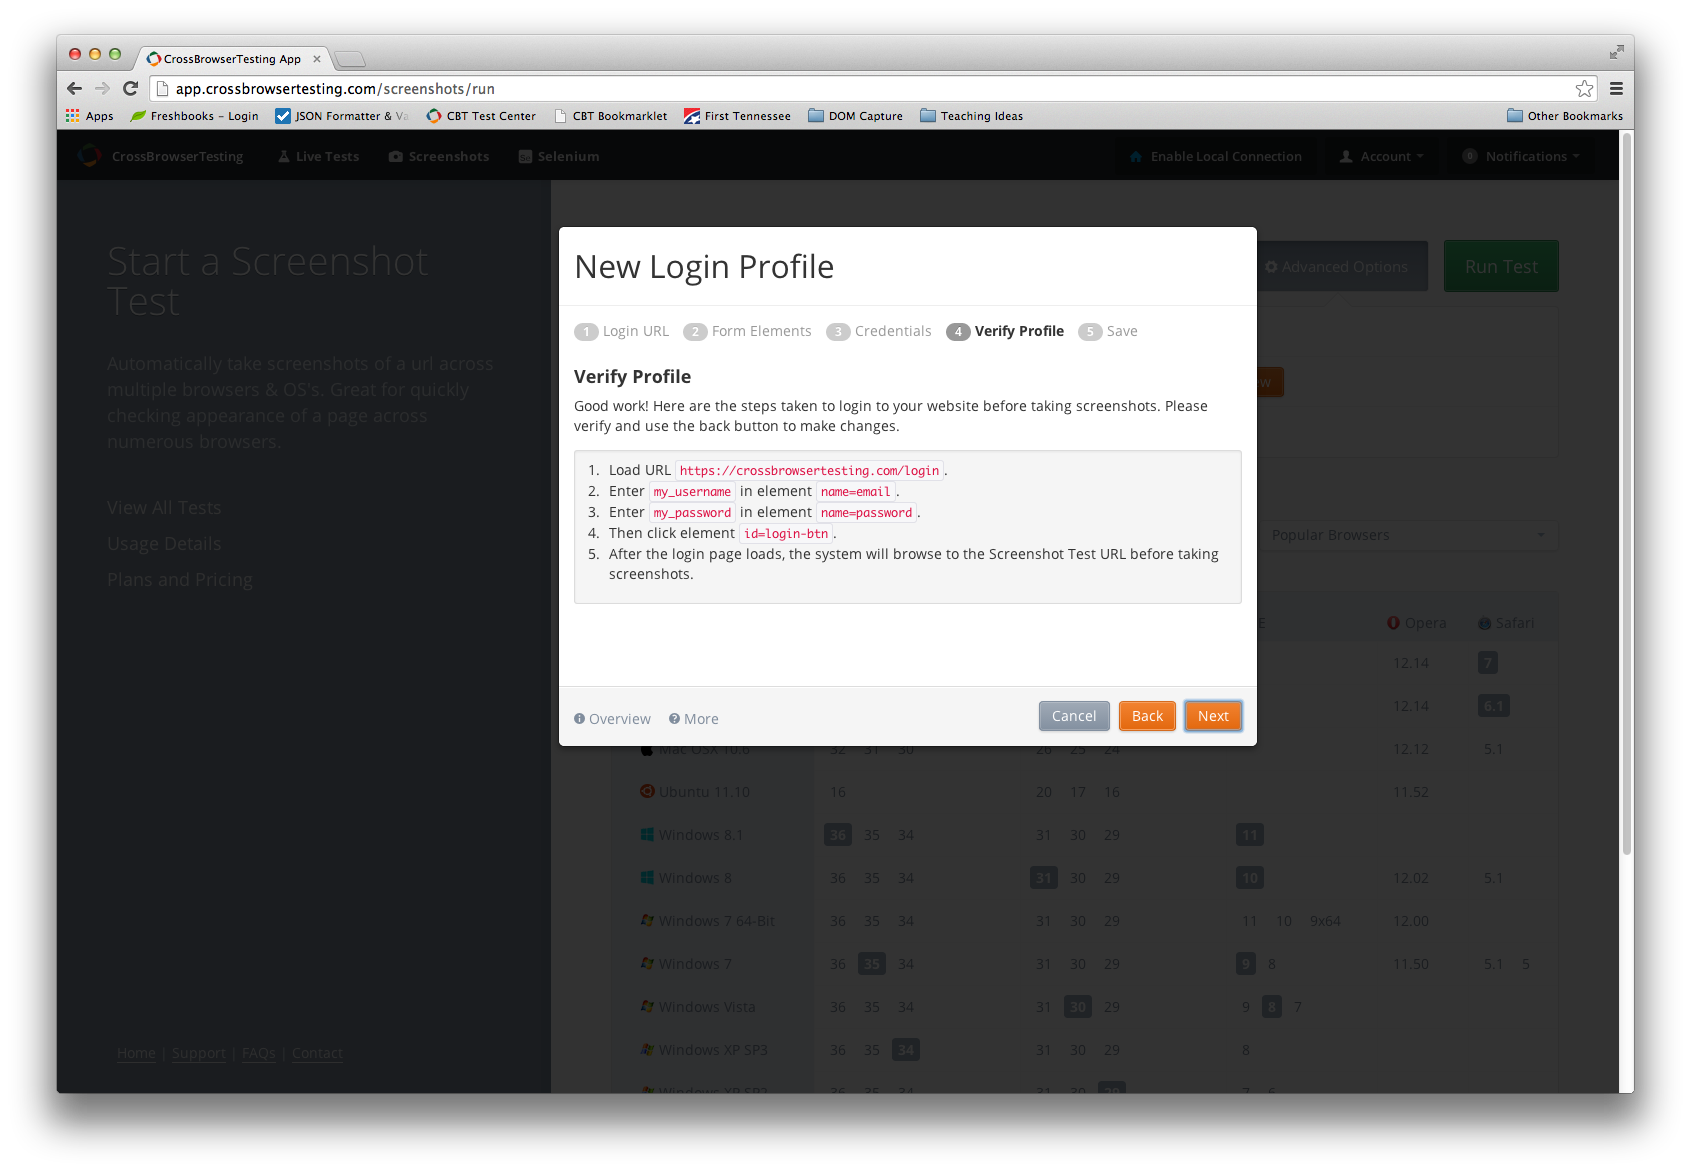
The next step asks you to review your profile settings and details the steps the screenshot system will take to automatically log in to your website.
-
Click Back if you need to make any changes, or click Next to continue.
-
-
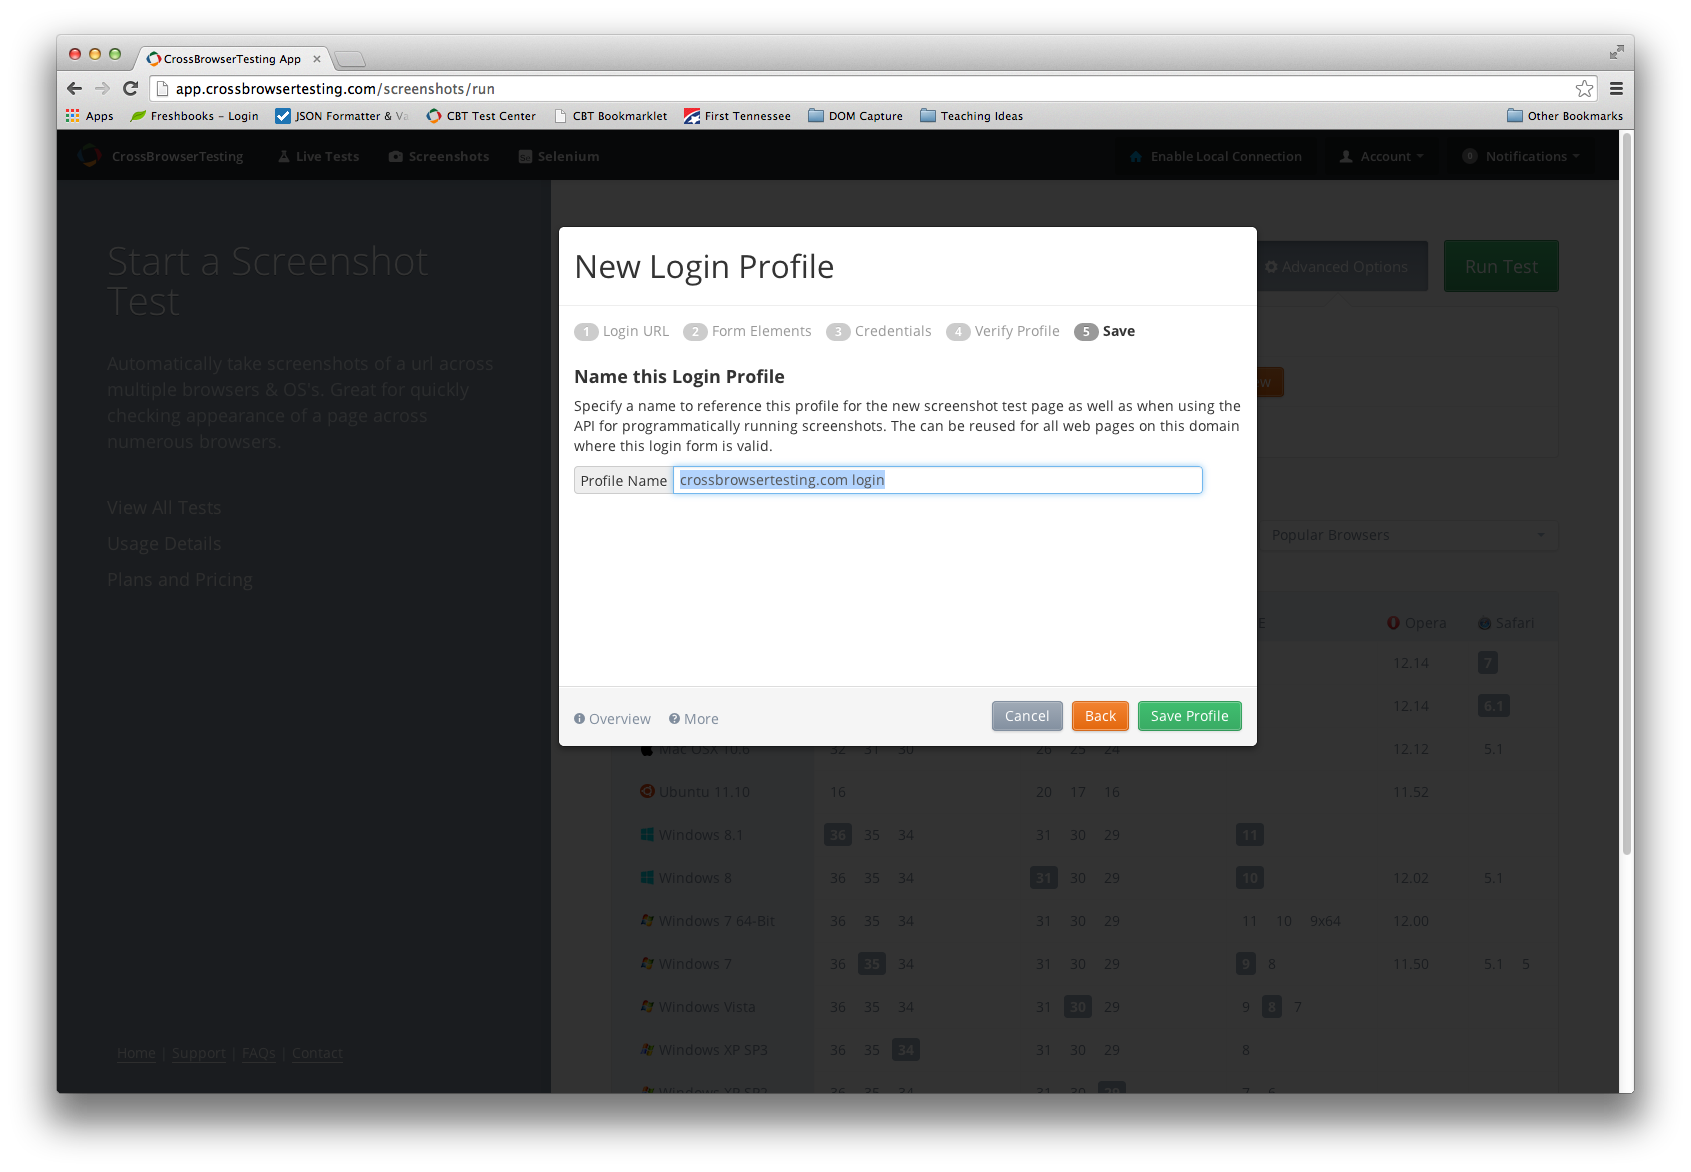
Name and save the profile
-
By default, the system will name your profile with the domain name of the login URL. You can change this at this step if you want to name it something more specific. If unsure, you can always rename it later.
-
Click Save Profile to finish.
-
-
Run a test with your new profile
-
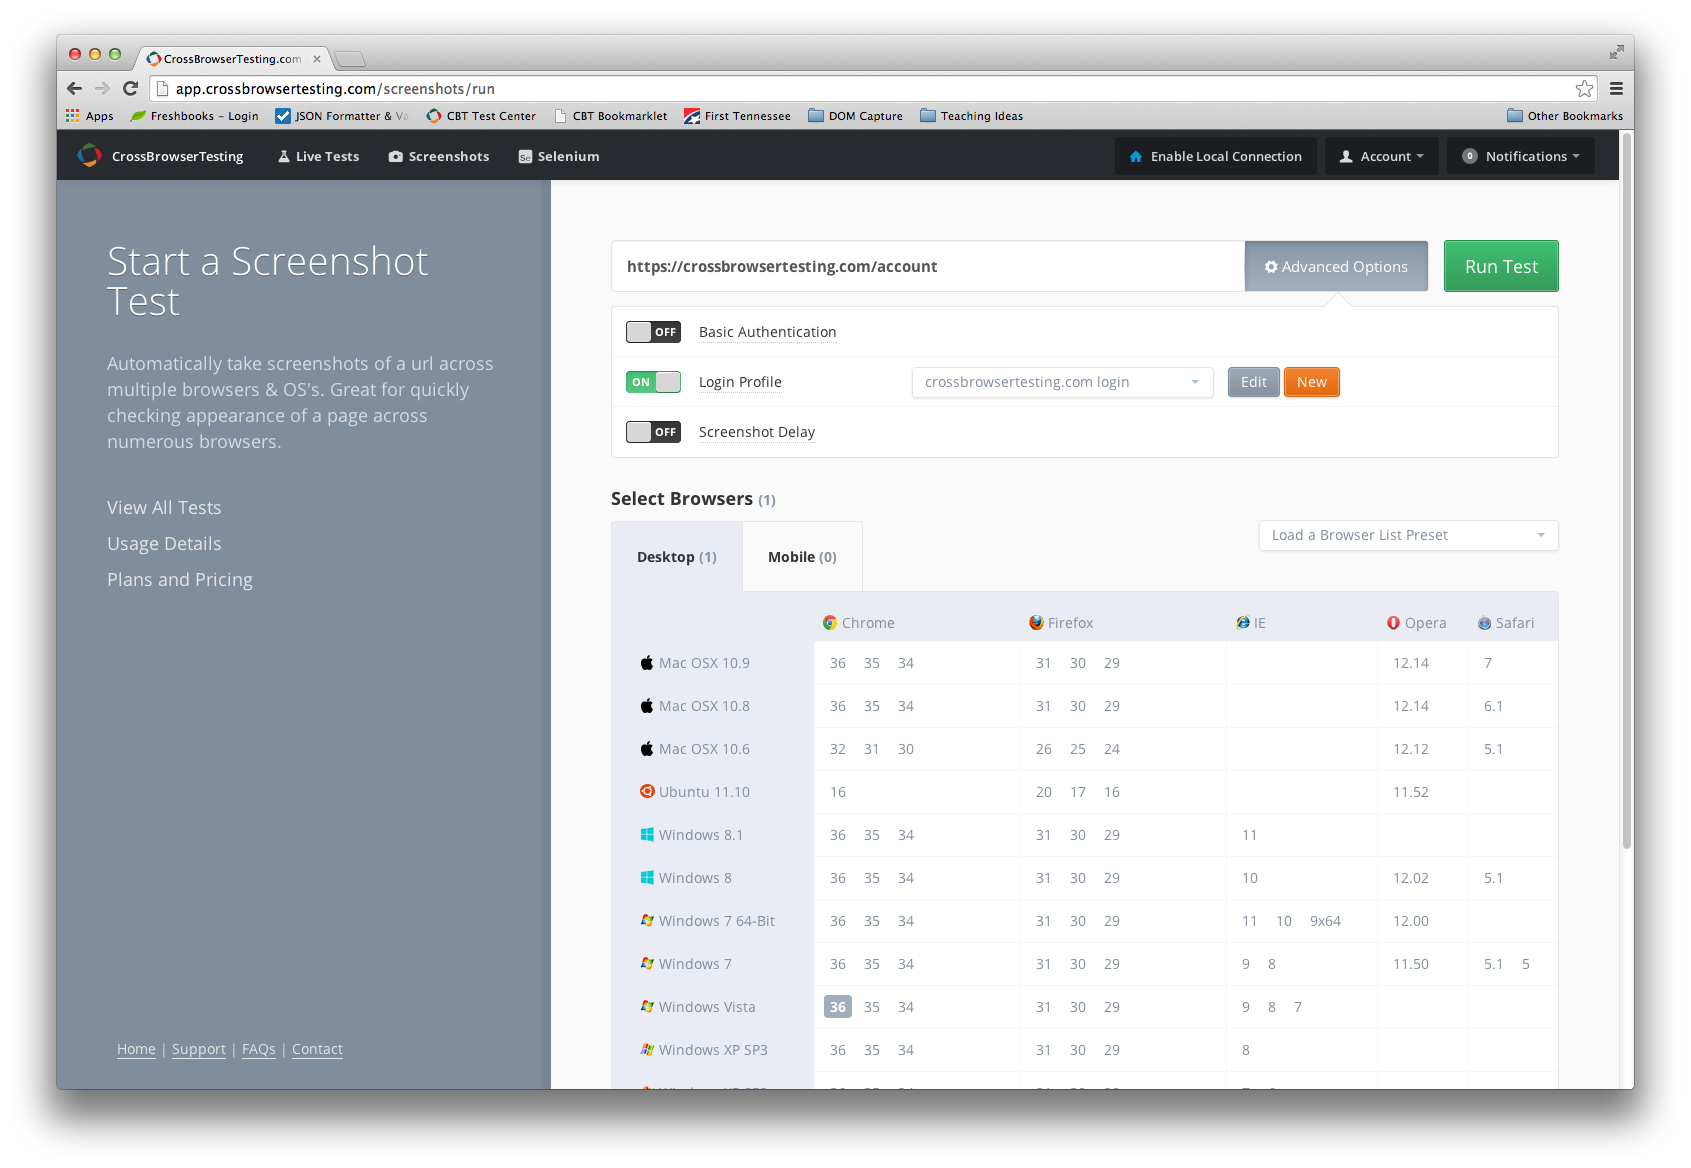
The new profile will be automatically selected after saving and can be selected from the dropdown on future screenshot tests.
-
Before running screenshots on multiple browsers, we recommend testing the login profile on one browser to ensure it works as intended. If one of the locators is incorrect, or the username and password was entered wrong, the screenshot will fail or return an unexpected result.
-
Clear the browsers selected and pick only one from the list before clicking Run Test.
-
-
Verify results
-
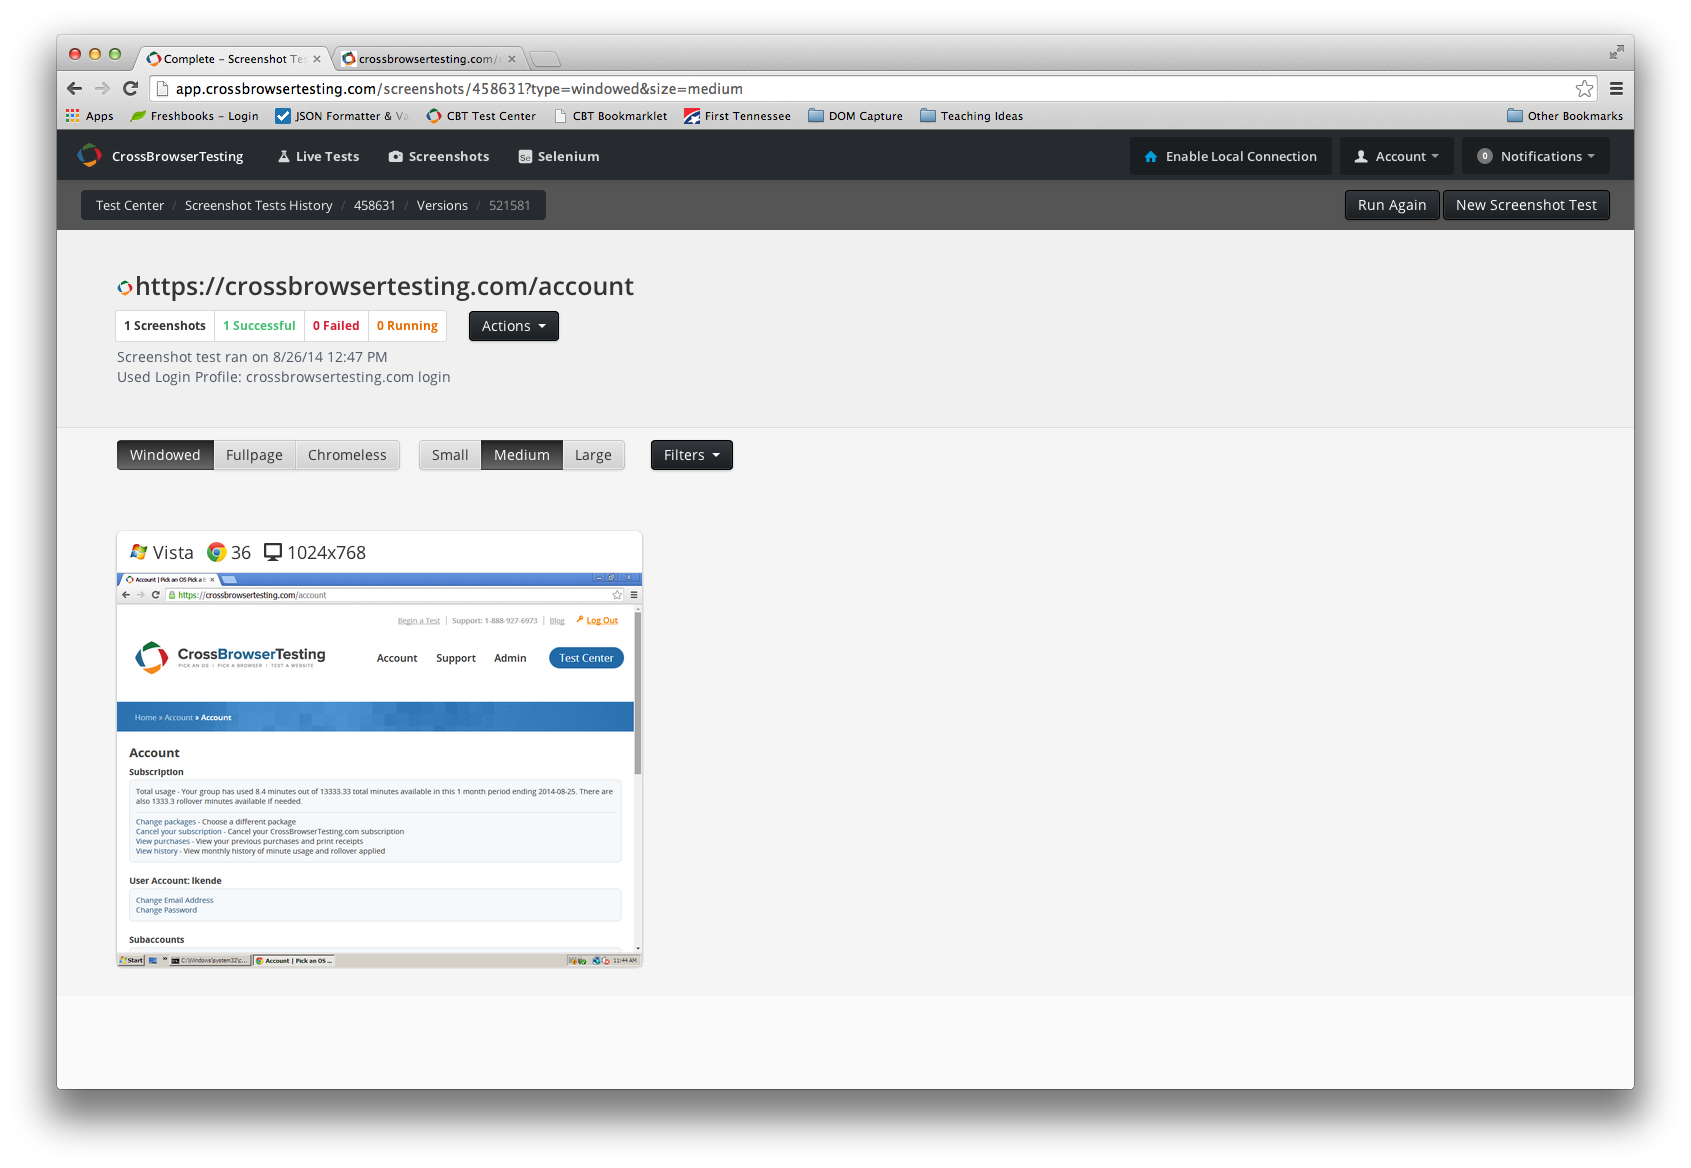
After your screenshot test completes, if everything works as expected, you should see a screenshot result for the page you intended. If not, you can edit the Login Profile and make changes as necessary.
-
Once you have verified your profile works, you can select the same login profile in advanced options from the dropdown on any screenshot test that requires it and feel confident to run tests on multiple browsers.
-

