With the Collaborator Eclipse Plug-in, you can add project files, files from Git commits and repository branches to a review directly from the Eclipse IDE. This topic explains how you can do this.
Requirements
To integrate with Git and Eclipse, Collaborator Eclipse Plug-in requires that the EGit plug-in be installed in your Eclipse IDE. The EGit plug-in typically comes bundled with the Eclipse package. For more information on it, see http://wiki.eclipse.org/EGit/User_Guide.
Add Git Files to a Review
To add your project's files to a review, follow these steps:
-
In Eclipse IDE, open the Package Explorer view.
-
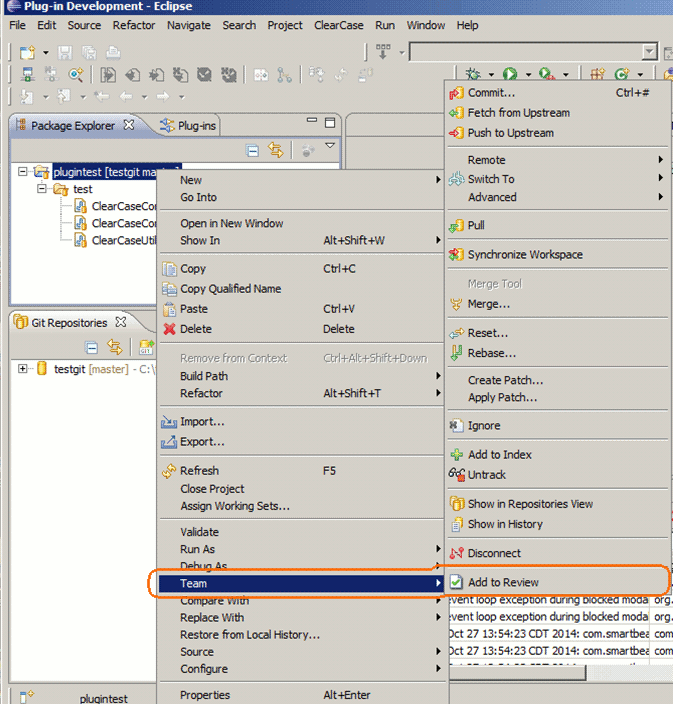
Right-click your project or any of the project's files and select Team > Add to Review from the context menu:
This will invoke the Add to Review wizard.
-
In the wizard, you specify the review name, and the project files and auxiliary documents to be attached to the review.
For detailed information on steps to be completed, see the wizard description.
After you click Finish on the last page of the wizard, the wizard will send review data to the Collaborator server.
Add Git Commits to a Review
Adding a Git commit to a review means including copies of all the files of this commit to the review. Follow these steps:
-
In Eclipse IDE, open the History view. It lists Git commits.
-
In the History view, right-click a commit and choose Add to Review from the context menu:
This will invoke the Add to Review wizard.
Known issue: In the Indigo version of the Eclipse IDE, the Add to Review item is present in the context menu only when you invoke it for the first time. Later, it is hidden from the menu. To solve the problem re-open the History view.
-
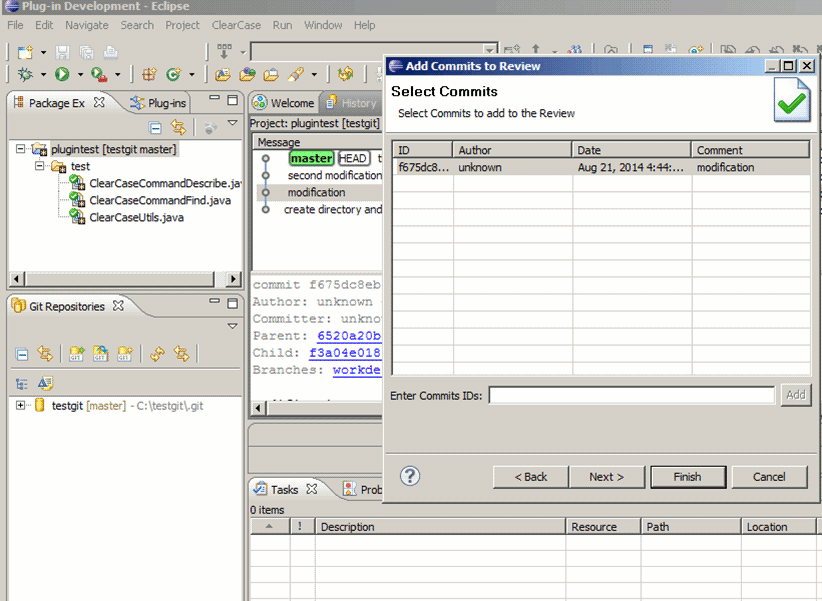
On the first page of the Add to Review wizard, you can select the commits, whose files the review will include.
By default, this page contains only the commit that you selected in the History view. To add more commits to the list, type the commit identifier into the Enter Commit IDs text box and click Add.
Click Next to continue.
-
On the subsequent pages of the wizard, you can specify the review name and auxiliary files to be included into the review.
After you go through all the pages of the wizard, it will upload the review data to the Collaborator server.
Add Files From Different Git Branches to a Review
The difference between two branches is in the committed files and the number of commits. Adding "differences" to a review means adding copies of all the files of all "different" commits to the review. Follow these steps:
-
In Eclipse IDE, switch to the Git Repositories view. It displays the contents of your Git repository.
-
In the Get Repositories view, select the the desired branches.
-
Right-click the selection and choose Add Branches to Review from the context menu:
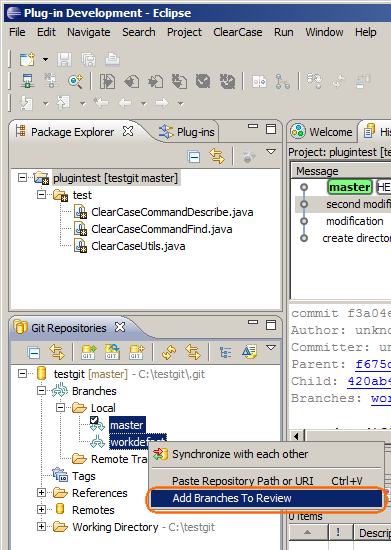
Adding files from different Git branches to a reviewThis will invoke the Add Git Diffs to Review wizard.
-
In the wizard, specify the review name —
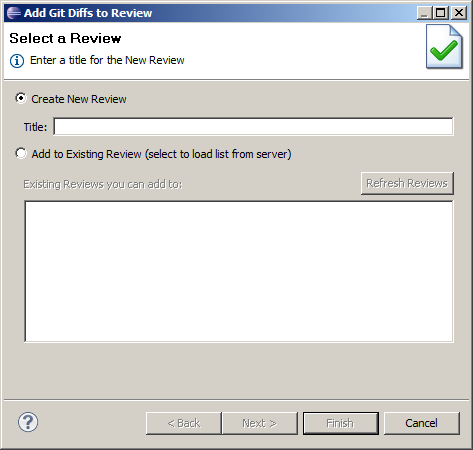
Adding files from different Git branches: Specifying the review name— and then select the branches to be passed to the
git diffcommand (the Collaborator Eclipse Plug-in calls this command to determine the files to be added to the review):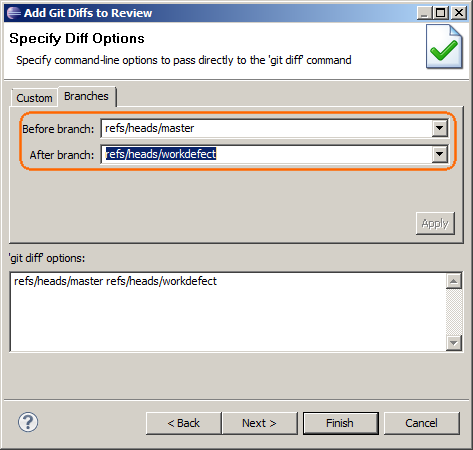
Adding files from different Git branches: Specifying the branchesThe before and after are just Collaborator terms to differentiate the branches. We suppose that one of these branches matches the original, or main, branch of your repository, and another branch contain the files that you modified while working on some feature.
-
Go through other pages of the wizard to complete the review creation.

