
The AlertSite Magento application extension enables web store owners to quickly see at a glance the current availability of their web store and how it is performing in real world.
This help guide is for Magento users who are familiar with the Magento Dashboard, System Configuration, and Extension Manager. It lists the steps needed to create a free AlertSite account, enable monitoring, how to modify the configuration, and how to view reported monitoring data.
Requirements
The Magento AlertSite extension requires a more recent version of PHP5 than is required for the Magento CE:
-
Magento requires PHP 5.2.13 or later.
-
The AlertSite extension requires a PHP version 5.3.6 – 5.4.11.
Install AlertSite Extension in Magento
To install the AlertSite extension in Magento, perform the following steps:
-
In your browser, log in to your Magento Admin Panel. Open a new tab and go to Magento Connect.

Click the image to enlarge it.
-
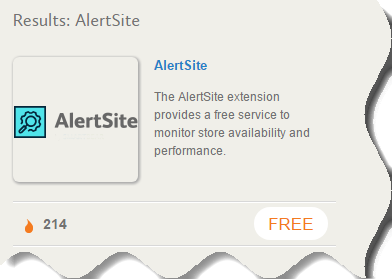
In the Search for Extensions search field, enter the extension name (AlertSite).

-
Click AlertSite in the result list:
-
On the extension installation page, click the Install Now button:

Click the image to enlarge it.
-
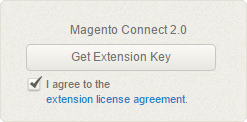
To install the AlertSite Magento extension, you need to get the Extension Key. Select the check box to accept the extension license agreement, and then click the Get Extension Key button.
-
Slect the extension key by clicking the Select Key button and copy it.

-
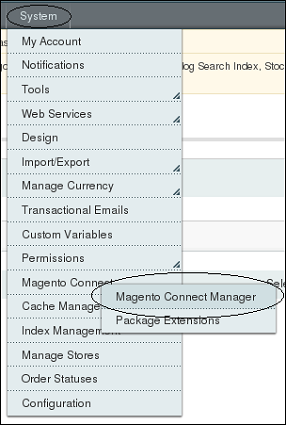
Switch to the Magento Admin Panel and click System > Magento Connect > Magento Connect Manager.
-
You may need to login again. Enter the Magento Connect Manager page. In the Install New Extensions section, paste the key into the field:

Click the image to enlarge it.
-
Click Install. The page will show the Extension Dependencies section filled in with the Package Name
smartbear_alertsite.
Click the image to enlarge it.
-
Click Proceed. You will see the installation results.

Click the image to enlarge it.
-
When the procedure is completed, scroll up the page and log out of the Magento Connect Manager. We recommend that you log out of the Magento Admin Panel as well to reset permissions that may not be set correctly for the new extension.
-
Log back in to the Magento Admin Panel and note the message showing that the AlertSite for Magento extension was successfully installed.

Now you are ready to create a free AlertSite account and begin keeping track of your web store's status and performance right from your Magento Dashboard.
Create and Enable a Free AlertSite Account
After installing the AlertSite for Magento extension, you will need to log out of both the Admin Panel and Magento Connect, then log back in to your Admin Panel. The following message will be displayed at the top:

-
Click here in the message to create the account. In the resulting page, click the Create my free account button to register:

Click the image to enlarge it.
-
Fill in the form presented. Some of the information is pre-populated from your Magento account with first and last name, login email address, and the URL to monitor. Enter a company name and phone number.
-
If needed, you can also modify the URL to monitor. Then, click the Create AlertSite Account button.

The URL must include http://. 
Click the image to enlarge it.
You have now created and registered an AlertSite account.
The Magento System Configuration page will display:

-
Click here in the message to begin monitoring your website in the AlertSite monitoring system.
-
A new tab with a confirmation message will appear:

You may close this tab.
Your website is now being monitored by AlertSite and providing the availability and performance information to your Magento Dashboard.
Access Availability and Performance Data in the Magento Dashboard
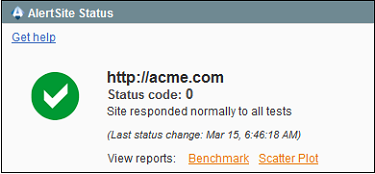
After establishing your free AlertSite account, click Dashboard to return to the main display. You will see the Status box at the bottom of the left sidebar with the following data:
-
Website being monitored
-
Current Status Code
-
Status Code description
-
Time stamp of the last status change
-
Benchmark Comparison link
-
Scatter Plot Report link
Modify the AlertSite Account Configuration
You can change the configuration of your AlertSite account at any time once your account is enabled. The fields you can modify are:
-
Monitoring mode (enable/disable)
-
Login ID
-
First Name
-
Last Name
-
Phone
-
URL to be monitored
To make changes to the configuration from the Magento Admin Panel:
-
Select the System > Configuration from the top menu.
-
Scroll down the Configuration menu in the left sidebar to see the Services section which will now show AlertSite:
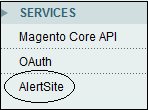
-
Click AlertSite to display the Magento System Configuration page with the current AlertSite account configuration.

Click the image to enlarge it.
After changing the configuration and clicking Save Config, the Status box in the Dashboard will reflect the changes immediately.
Advanced Configuration for AlertSite Account Holders
If you are a regular AlertSite customer, the Advanced Configuration page will allow you to change the original monitor or the DéjàClick URL monitor being monitored in your Magento AlertSite extension to a site or single URL transaction currently being monitored in your AlertSite account.
-
Click the link at the bottom of the form to display the Account Recovery/Edit form:

Click the image to enlarge it.
-
Change the Login Email and Account Password options in your AlertSite credentials. To change the Basic Site ID or Deja URL ID:
-
Log in to your AlertSite account.
-
Click the "wrench" icon next to the site or single URL transaction monitor you want to display in Magento - a new window will be displayed with the monitor configuration.
-
In the URL field of the new window, locate the parameter
&obj_deviceand select the number it is set to, for example,&obj_device=130707. -
Replace theBasic Site ID or Deja URL ID, depending on which AlertSite monitor you are changing to.
-
Click the Save AlertSite Account button.
-
-
Return to your Magento Dashboard and verify the change in updated Status box.
|
The Advanced Configuration feature is available for AlertSite account holders only. |
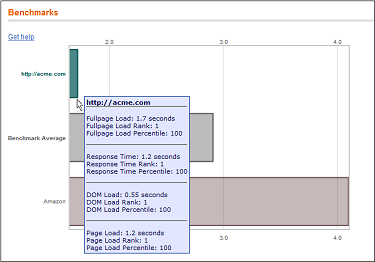
Real Time Reports
There are two reports that are instantly accessible from your Magento Admin Panel, giving you a quick visual check of your site's response time performance and how it stands up to a well-known public site:
-
Benchmark Report - A comparison of your site's performance with an industry benchmark.
-
Scatter Plot - Shows your site's response time over time.
Hovering over a point on the Scatter Plot or the bar in the Benchmark Report displays a tooltip with a snapshot of the data.
There are two ways to access the reports:
-
From the Reports dropdown menu:
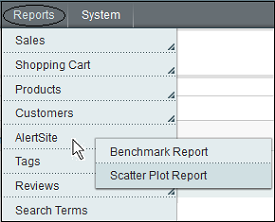
-
From the Dashboard Status box:

Here are examples of the two reports with and without report tooltips:
| Benchmark Report | Benchmark Report with Tooltip |
|---|---|
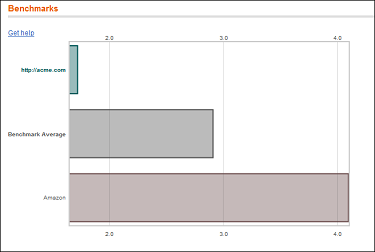 |
 |
| Scatter Plot Report | Scatter Plot Report with Tooltip |
|---|---|
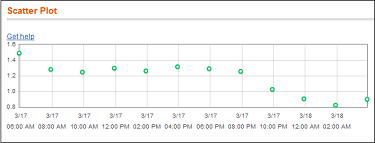 |
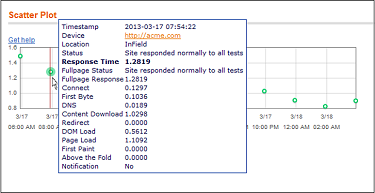 |
Exchange Information with the AlertSite for Magento Community
If you have any ideas, suggestions, or questions, visit the AlertSite Community to can communicate with other users of the AlertSite for Magento extension.
How to Sign Up for a Full-Service AlertSite Trial Account
Now that you see the benefits of monitoring your website or on-line store, consider signing up for a free, no-obligation 30-day trial account. With your trial User ID, you can log in to your AlertSite account Console and take advantage of these additional features:
-
Dashboard - Bird's-eye view of your monitored sites and transactions.
-
Charts - An easy-to-use snapshot of activity over a specified time range.
-
Scheduled Summary Report - A daily Performance and Availability report sent via email.
-
Ad Hoc Performance Reports - A complete list of comprehensive reports with drilldown capability all the way to the page object level.
-
Multi-Step Transactions - Records a series of steps through your on-line store or website to test your full application.
-
Error Alerts - Sets up an email, text message, or VoIP phone call to let you know if your site is down or hacked.
-
Performance Alerts - Configures an alert to let you know if your site is performing slower than you expect.
To sign up for a free trial, click here.
At any time during the trial, you can convert to a full-service account and gain additional features, or cancel. Your account representative's contact information is available right from your Console.