
You can customize panel layouts in LoadComplete and create custom docking schemes. This feature is especially convenient for smaller display resolutions, since it allows you to display several panels simultaneously.
 Docking Basics
Docking Basics
Docking panels in LoadComplete is similar to the docking allowed in Visual Studio. To undock a panel and change its position, simply double-click or drag the panel’s caption. This will turn the panel into a floating window. Please make sure that the Tools | Docking Allowed menu item is checked, since the docking function is only active when this item is checked. See below for more information. You can then drag the panel to the desired place. When you are dragging the undocked panel over another panel, LoadComplete will show the docking zone selector, which lets you specify where the panel will be docked if you release it:
To dock a panel to the top, left, bottom or right edge of the lower panel, move the mouse cursor to the  ,
,  ,
,  or
or  icon within the Selector and then release the mouse button. Once a floating panel has been docked onto another panel, it still has a caption bar, with a name at the left and buttons at the right, and the previous contents likewise have a caption bar on top of their section of the page. Any section can again be turned into a floating window by dragging the caption.
If you select the  icon in the docking zone selector, the floating panel will be docked as a tabbed page. See below for more information about this.
| Tip: | You can quickly dock a floating panel back to its previous location by double-clicking the panel caption. |
Disabling and Enabling the Docking
Use the Tools | Docking Allowed menu item to enable and disable docking. When docking is disabled, the current docking scheme cannot be changed. That is, it is impossible to move a docked panel to another location. The docking works only when the Tools | Docking Allowed menu item is checked:

By default, this item is not checked to prevent occasional changes of the panels layout. To customize panel layouts, first check the Docking Allowed menu item and then manipulate the individual panel layouts. To customize details of the display, use the User Interface Options dialog.
If you feel the panels are undocking too easily, simply lock them in place by turning off the Tools | Docking Allowed menu item.
Docking as Tabbed Pages
If you select the icon in the docking zone selector, the floating panel and the lower panel will be docked at the same spot. In this case, the panels will be organized as tabbed pages (tabbed panels are simply panels that are not docked inside one another, but at the same spot). You can dock more than two panels to the same spot. To undock a tabbed panel, just drag or double-click its caption.
When you are dragging a float panel over a tabbed one, besides the docking zone selector in the center of the tabbed panel LoadComplete will also show docking zone selectors along the edges of the tabbed page. These selectors let you dock the floating panel relative to the whole tabbed spot. Using the central selector you will dock the floating panel to the tabbed panel that is currently in front of the other tabbed pages. If you select this variant, then the tabbed page will contain two panels. The following figure illustrates this situation:
Right-clicking a tab shows the context menu with the following items:
| Menu Item | Description |
|---|---|
| Hide | Hides the tabbed page. |
| Rename | Calls the Panel Caption dialog where you can rename the tab. |
| Tabs | Shows the available panels (currently tabbed). |
| Top and Bottom | Specifies the tab location. |
| Help | The Help item is displayed if the tabbed page contains only one panel. It calls the help topic with the panel description. If the tabbed page contains several panels (for example, the Project page), the Help item is hidden. |
Auto-Hiding
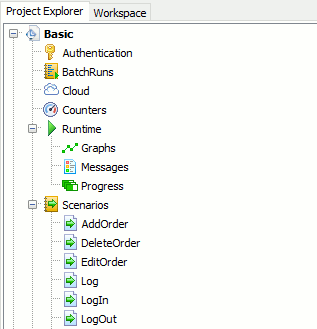
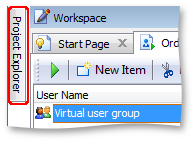
A docked panel can be auto-hidden. Auto-hide means a panel can be minimized along one of the sides of the docking site, so only the panel’s caption remains visible. For instance, on the following figure the Project Explorer panel is auto-hidden:
To hide a panel, click the  button in the panel’s caption.
To view an auto-hidden panel, move the mouse cursor to the panel caption or click the caption and the panel will pop up.
To show a hidden panel, simply click the  button in the panel caption.
Docking in Workspace and Log
The Workspace panel displays editor and log panels. Each window that is displayed in the Workspace act as a panel. You can undock and re-dock these windows within the Workspace panel in the same manner in which you dock other panels within LoadComplete’s window.
Test results displayed in the Workspace panel are organized into several panels. These panels can be docked in the same manner, in which you dock panels within the LoadComplete window.
| Note: | To enable and disable docking within the Workspace and Log panels, use the Tools | Docking Allowed menu item. |
Saving and Loading Docking Settings
To restore the default panel layout, press the View | Desktop | Restore Default Docking menu item. View | Desktop | Save Docking to File will save the current layout to a .tcDock file, and View | Desktop | Load Docking from File will load a saved layout.
The View | Desktop | Save Desktop As and View | Desktop | Load Desktop menu items will save and load the panel layout along with the toolbar layout.
See Also
Arranging Columns, Lines and Panels
Working With LoadComplete Toolbars and Menus